Category: imagelean

  • Compress BMP Files: 3 Proven Ways to Shrink Them Fast

    Compress BMP Files: 3 Proven Ways to Shrink Them Fast

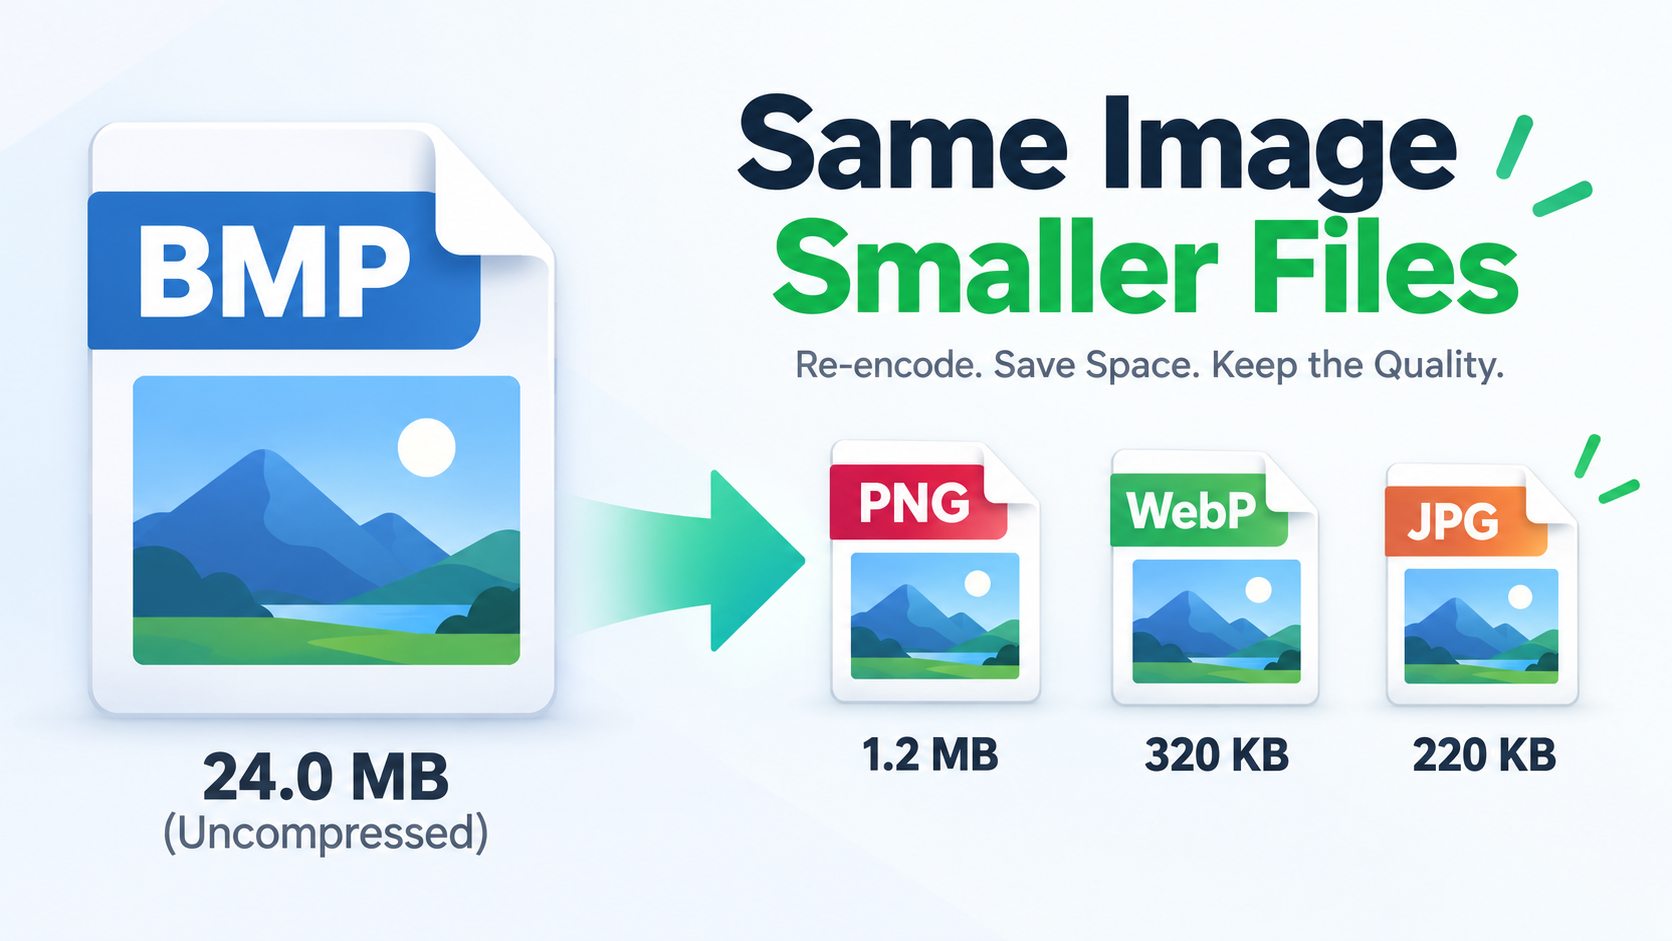
    Header: A large BMP file becoming smaller PNG, WebP, and JPG files

    BMP stores every pixel uncompressed, so you can’t compress BMP much while keeping the .bmp extension. The practical fix is to re-encode as PNG or WebP for lossless savings, or JPG for photos — usually cutting file size by more than half.

    How to Compress a BMP File: The Three Paths That Actually Work

    Before you open a tool, know that “compress BMP” isn’t a single operation. There are three real paths, and only one of them keeps the .bmp extension. Pick the wrong one, and you can spend an hour dragging sliders only to end up with a file that’s barely smaller.

    Path A — re-encode to PNG or WebP. This is lossless re-encoding. Every pixel you get back matches the one that went in, but the file is usually 60–80% smaller. Why? The encoder removes redundancy BMP never bothered to remove. It’s the best fit for screenshots, line art, logos, and CAD or GIS exports.

    Path B — re-encode to JPG. This is lossy, and it gives you the smallest file for photographs. It also adds visible ringing and blocking around text and hard edges, which is why it’s a poor choice for anything that looks like a diagram.

    Path C — keep the .bmp extension. ZIP or Deflate archiving, RLE encoding, or reducing bit depth and DPI. These are real, working options, but the savings are modest compared with a format change.

    The one-line decision shortcut: photograph → JPG or WebP; screenshot, line art, or scan → PNG; web page asset → WebP; must stay .bmp → ZIP or RLE.
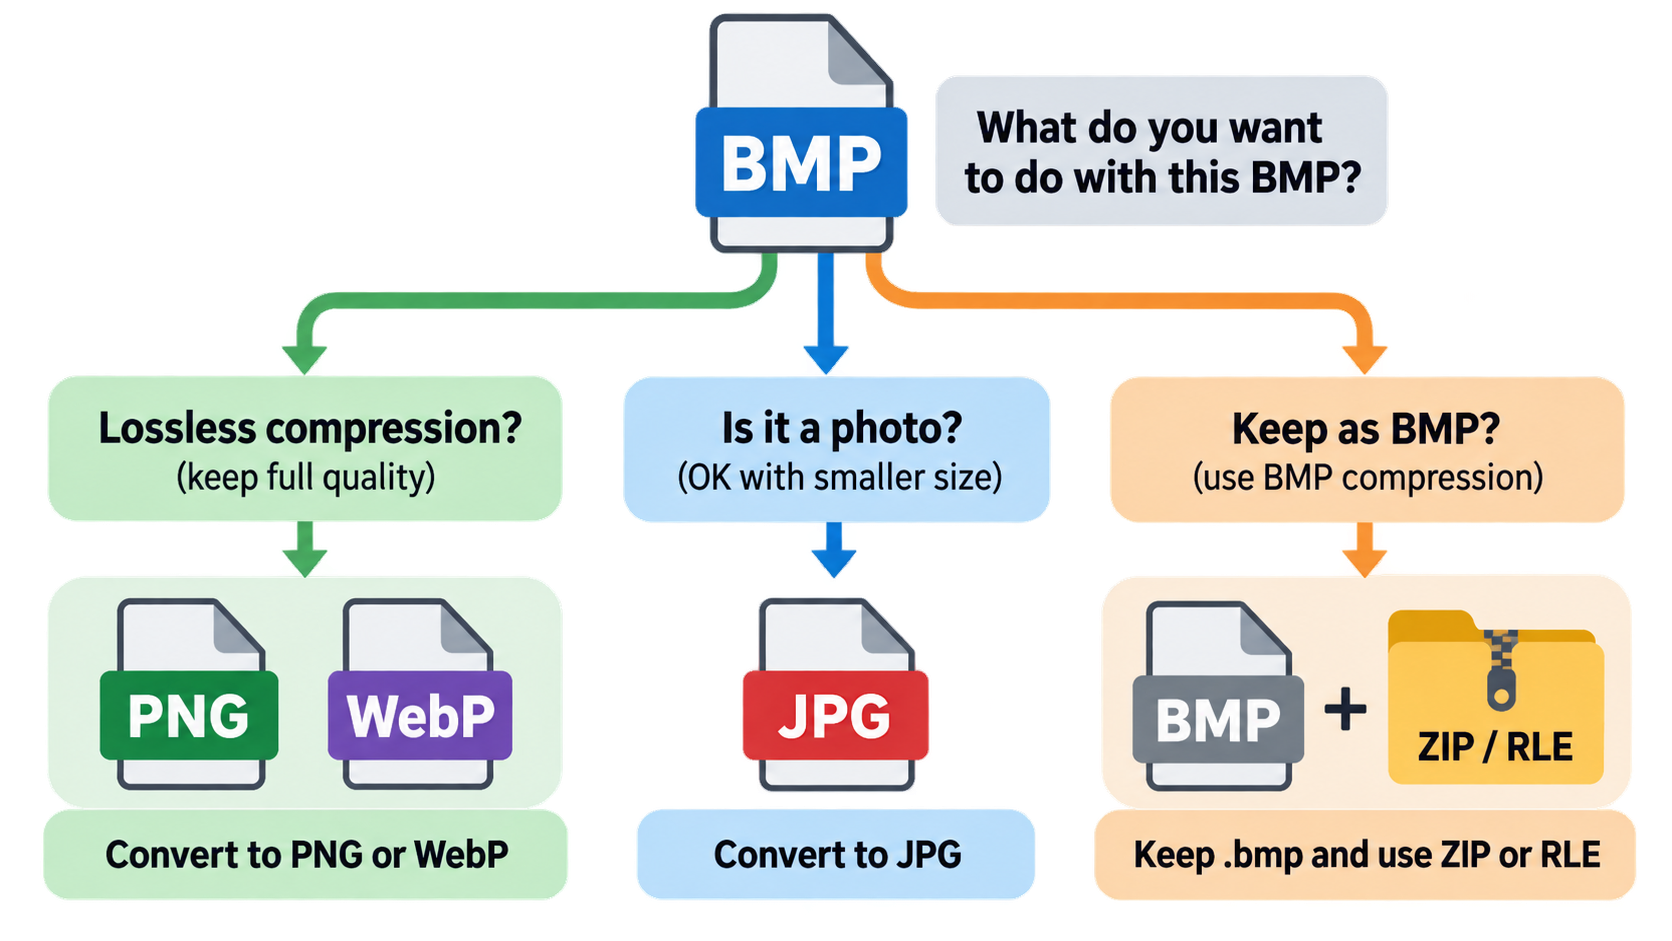
    Three-path BMP compression decision flow

    Path A: Re-encode to PNG or WebP (Lossless)

    PNG is the default lossless target. It applies Deflate compression to the raw pixel data, and according to CoolUtils, that cuts BMP file size by 60–80% with no quality difference. WebP offers a lossless mode that generally goes smaller still, and it is supported by every current major browser.

    Because nothing is discarded, this path is safe for images where accuracy matters: screenshots of application UIs, scanned pages that need to stay legible, monochrome technical drawings, and exported maps. You can verify the result by opening both files side by side at 100% zoom — they should be indistinguishable.

    Path B: Re-encode to JPG (Smallest, Photos Only)

    JPG wins on raw byte count for photographs, where smooth gradients and fine noise tolerate lossy compression well. The trade-off is real but localized. Compression artifacts appear first around sharp transitions, which is precisely where text, table borders, and thin vector-like lines live.

    Use JPG for camera output and continuous-tone imagery. Do not use it for screenshots of documents, terminal windows, or CAD drawings — the text becomes fuzzy at exactly the zoom level people use to read it.

    Path C: Keep the .bmp Extension (Limited but Possible)

    Some pipelines cannot accept PNG. Legacy Windows software, industrial control panels, and older medical imaging systems expect raw bitmap data, and swapping the extension breaks the workflow. In that case your options are general-purpose lossless archiving, BMP’s own RLE encoding for indexed images, or reducing the bit depth or pixel dimensions. Each works; none gets you close to what PNG would deliver. The next section covers each in detail.

    Why BMP Files Are So Large: The Windows Bitmap and Its Uncompressed Pixels

    BMP is one of the oldest image formats on the IBM PC. According to Wikipedia, the format was first released by Microsoft in December 1987, and the modern file structure most applications write today arrived with Windows 3.0 in 1990. Its history is visible in the header sizes: the 12-byte BITMAPCOREHEADER was the original, the 40-byte BITMAPINFOHEADER came with Windows 3.0 in 1990, the 108-byte BITMAPV4HEADER arrived with Windows 95 and NT 4.0, and the 124-byte BITMAPV5HEADER came with Windows 98 and Windows 2000.

    The reason for the size problem sits in the pixel format, not the header. BMP defaults to BI_RGB, meaning every pixel is stored literally on disk. There is no entropy-coding step, no dictionary, no prediction — nothing that looks at the image as a whole and removes repetition. The bytes on disk are essentially a dump of the frame buffer.

    This reframes the entire task: “compressing” a BMP is really a re-encoding decision. It is not a quality slider you drag until the number gets small enough.

    The Pixel Array, Row Padding, and the Size Formula

    For an uncompressed bitmap, the pixel array is written as successive scan lines, each rounded up to a multiple of 4 bytes — the padding is called the stride, and the pad bytes are not necessarily zero. Total pixel data lands at roughly width × height × bytes-per-pixel, plus padding overhead. Color tables, when present for indexed images, add a small fixed amount.

    That formula is also the diagnostic. If a file is unexpectedly huge, either the pixel dimensions are large, the bit depth is 24 or 32, or both. There is nothing hidden to blame.

    Bit Depth and DPI: Why a 300 DPI Scan Hits 25 MB

    Size scales with both bit depth and resolution, and print-oriented scans push both up at once. CoolUtils puts a single A4 page rendered at 150 DPI (1240 × 1754 pixels, 24-bit color) at roughly 6 MB as a BMP. The same page at 300 DPI reaches about 25 MB.

    A 300 DPI A4 page is 2480 × 3508 pixels — four times the pixel count of the 150 DPI version — and at 24 bits per pixel that multiplication lands directly on the file size. This is why scanned documents and PDF-to-BMP exports produce files that resist email attachment limits.
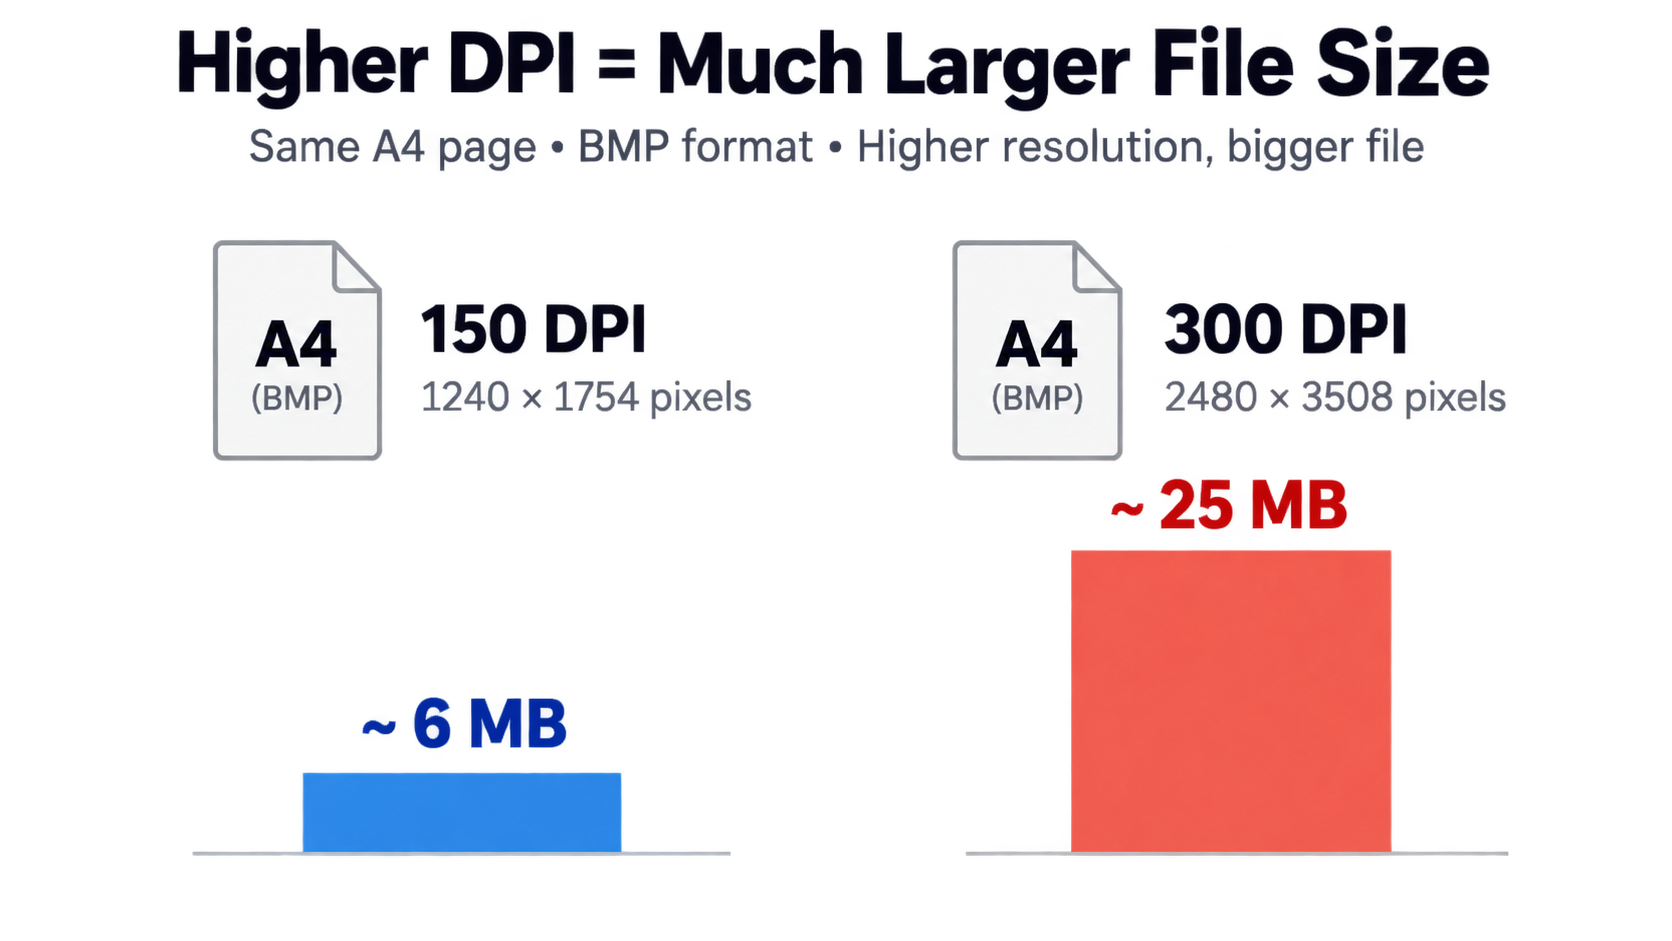
    A4 BMP size at 150 DPI vs 300 DPI

    Compressing a BMP Without Changing the Format

    This is the question most tool pages skip: sometimes the extension simply cannot change. Legacy Windows applications such as Paint, older medical imaging software, and industrial control panels expect raw bitmap data rather than a compressed image, and a PNG renamed to .bmp will not load. If you are in that situation, four options remain.

    Option 1 — general-purpose lossless archiving. Wikipedia notes that because uncompressed BMP files hold a great deal of redundant data, they can often be reduced substantially by general-purpose lossless compression such as ZIP or RAR. Nothing about the image changes; you simply wrap it in a container that removes the repetition. The downside is that the recipient must decompress before opening.

    Option 2 — BMP’s own RLE encoding. BI_RLE4 and BI_RLE8 are run-length encoding modes defined in the format itself. They are limited to 4-bit and 8-bit indexed-color images, which excludes most contemporary content.

    Option 3 — reduce bit depth. Dropping 24-bit true color to an 8-bit indexed palette cuts pixel data by roughly two-thirds. It only works cleanly when the image genuinely uses few distinct colors — screenshots of text, monochrome line art, simple diagrams.

    Option 4 — crop or downsample. Fewer pixels is the only guaranteed byte reduction, but it changes the image dimensions rather than compressing it.

    Set expectations honestly: staying inside .bmp caps your achievable savings well below what PNG or WebP would give you on the same file.

    ZIP and Deflate: Lossless Shrinking Without Touching a Pixel

    ZIP is the safest option because it is fully reversible and requires no format knowledge. The compression ratio depends on how repetitive the pixel data is — a flat white scanned page compresses dramatically better than a photograph, which has high per-pixel entropy. For archival storage of BMPs you cannot convert, ZIP or RAR is the default answer.

    RLE Encoding: Only for Indexed 4- and 8-Bit BMPs

    Run-length encoding replaces sequences of identical pixel values with a count and a value. It works well on flat regions and poorly on noise. In practice, RLE is a legacy capability rather than a routine choice, and most modern encoders do not offer it as an output option at all.

    Lower Bit Depth, Crop, or Downsample

    If the BMP only exists to feed a display or a print at a known size, reducing bit depth or DPI is legitimate. Check whether the image is truly 24-bit color or merely a 24-bit container holding a handful of colors — the difference determines whether an 8-bit palette is lossless in practice. Crop first: removing empty margins costs nothing and reduces the pixel count before any other step.

    PNG vs JPG vs WebP vs PDF: Which Format Shrinks a BMP the Most?

    The best target format depends on what the image contains and where it is going, not on which format has the best reputation.

    Decision Table: Pick the Format by Image Type

    Image type Best target Why
    Screenshot (UI, dialog, terminal) PNG Lossless, keeps text and 1-pixel borders sharp
    Scanned document page PNG, or PDF for archiving Legible text, no artifact buildup
    Line art, logo, icon PNG or lossless WebP Flat colors compress extremely well
    CAD or GIS export PNG Preserves thin lines without ringing
    Photograph JPG or lossy WebP Lossy compression is efficient on continuous tone
    Web page asset WebP (AVIF as a next-gen option) Smaller transfer size, broad browser support

    PNG is the default lossless target and the one with the clearest published numbers: 60–80% smaller than the source BMP with no quality difference, per CoolUtils. WebP usually beats PNG at the same visual quality for web delivery, and AVIF can go smaller still, though support is less universal.

    Tie the choice to the delivery target. For web pages, smaller images support faster Largest Contentful Paint and less layout shift in Core Web Vitals. For email, the constraint is an attachment limit. For print archiving, it is fidelity.

    Why JPG Ruins Text and Line Art

    JPG compresses by discarding high-frequency detail, and text edges are almost pure high-frequency detail. The result is ringing — faint halos around letters — and blocking, where the image breaks into visible 8×8 tiles. On a photograph nobody notices. On a screenshot of a spreadsheet, it makes numbers hard to read.
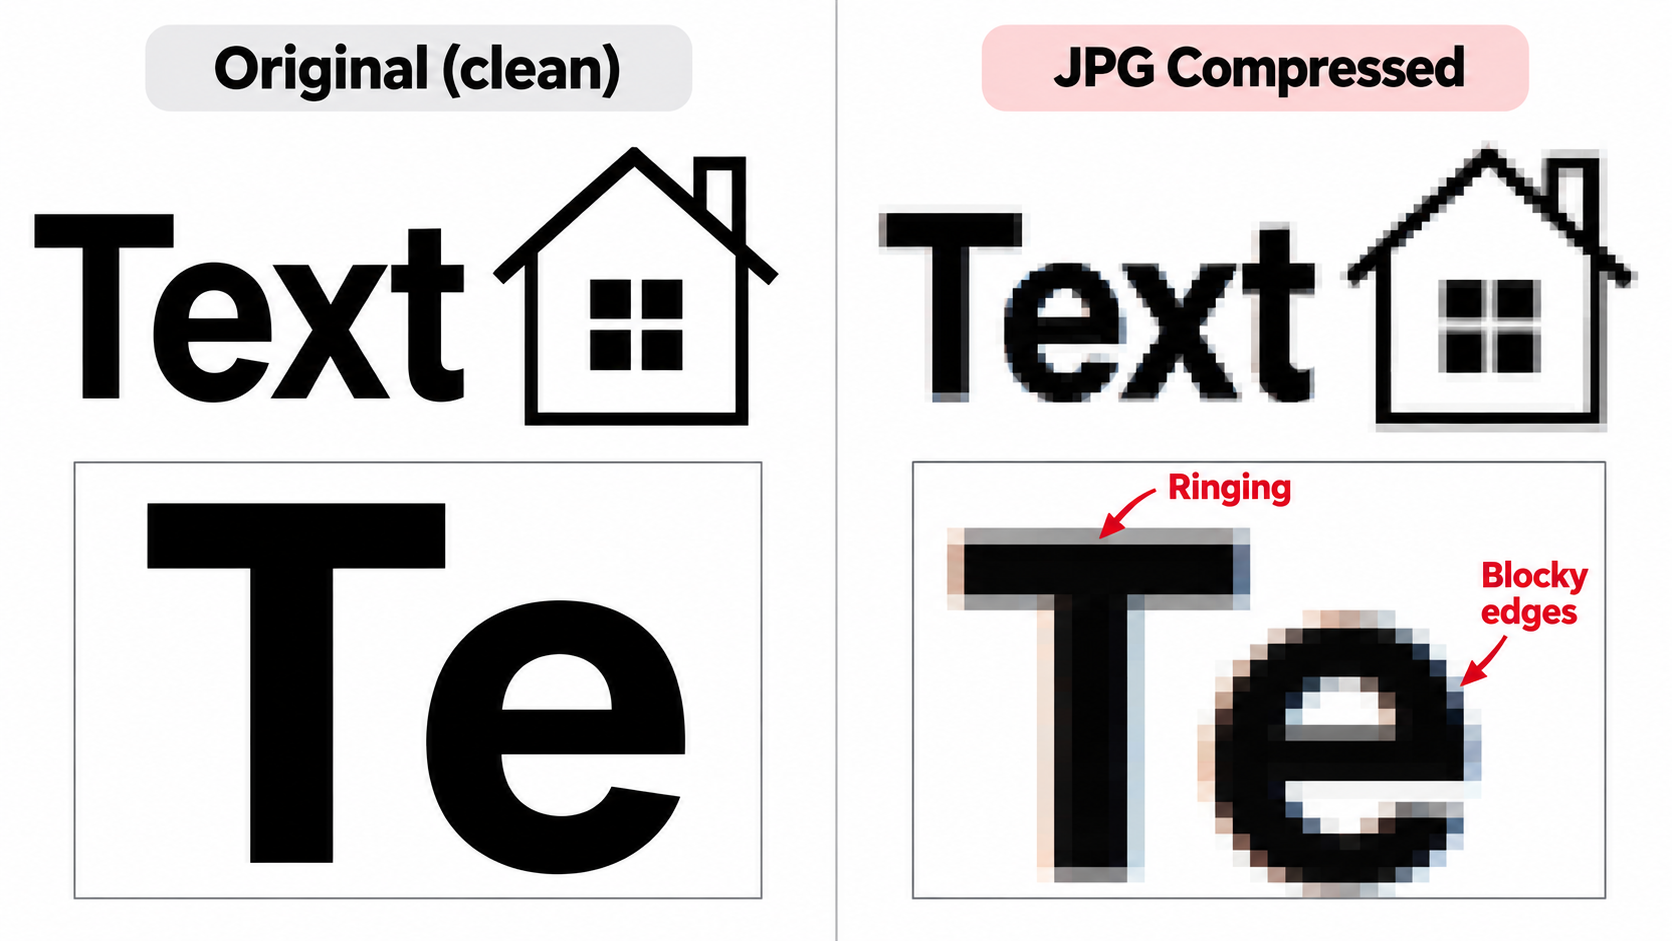
    Sharp text vs JPG-artifacted text close-up

    WebP, AVIF, and PDF for Specific Delivery Targets

    WebP compresses further than PNG or JPG for the same visual quality at high resolutions, which is why it has become the default recommendation for modern websites. AVIF is a next-generation format offering strong compression with high quality; it is gaining adoption but is worth verifying on your target platform.

    PDF behaves differently from the image formats. It is a container, not a compression codec, and the converter applies Flate or JPEG compression inside the PDF — which CoolUtils says can shrink a file dramatically compared with the raw BMP. That makes PDF a strong choice when the destination is a document to be emailed, printed, or archived rather than an image to be edited. For a sense of magnitude, ResizerPicture demonstrates an 8 MB source photo becoming a 450 KB JPG and then a 220 KB WebP — vendor self-reported figures, useful as an order-of-magnitude reference rather than a promise.

    How to Compress a BMP Online in 3 Steps (No Install)

    Browser-based converters handle the format change without any software. The process is short enough that the harder decisions are the format and quality settings you pick, not the click sequence.

    Step-by-Step: From .bmp Upload to Smaller Download

    Step 1: Upload the .bmp. Drop the file into a browser-based BMP compressor. Some tools also accept a URL or a cloud storage import.

    Step 2: Choose the output format and quality. Pick PNG for screenshots and line art, JPG or WebP for photographs, or PDF if the goal is a shareable document. If the tool exposes a quality slider, start high and step down.

    Step 3: Download the result. Single files download directly. Tools that handle multiple files typically package everything into one ZIP.
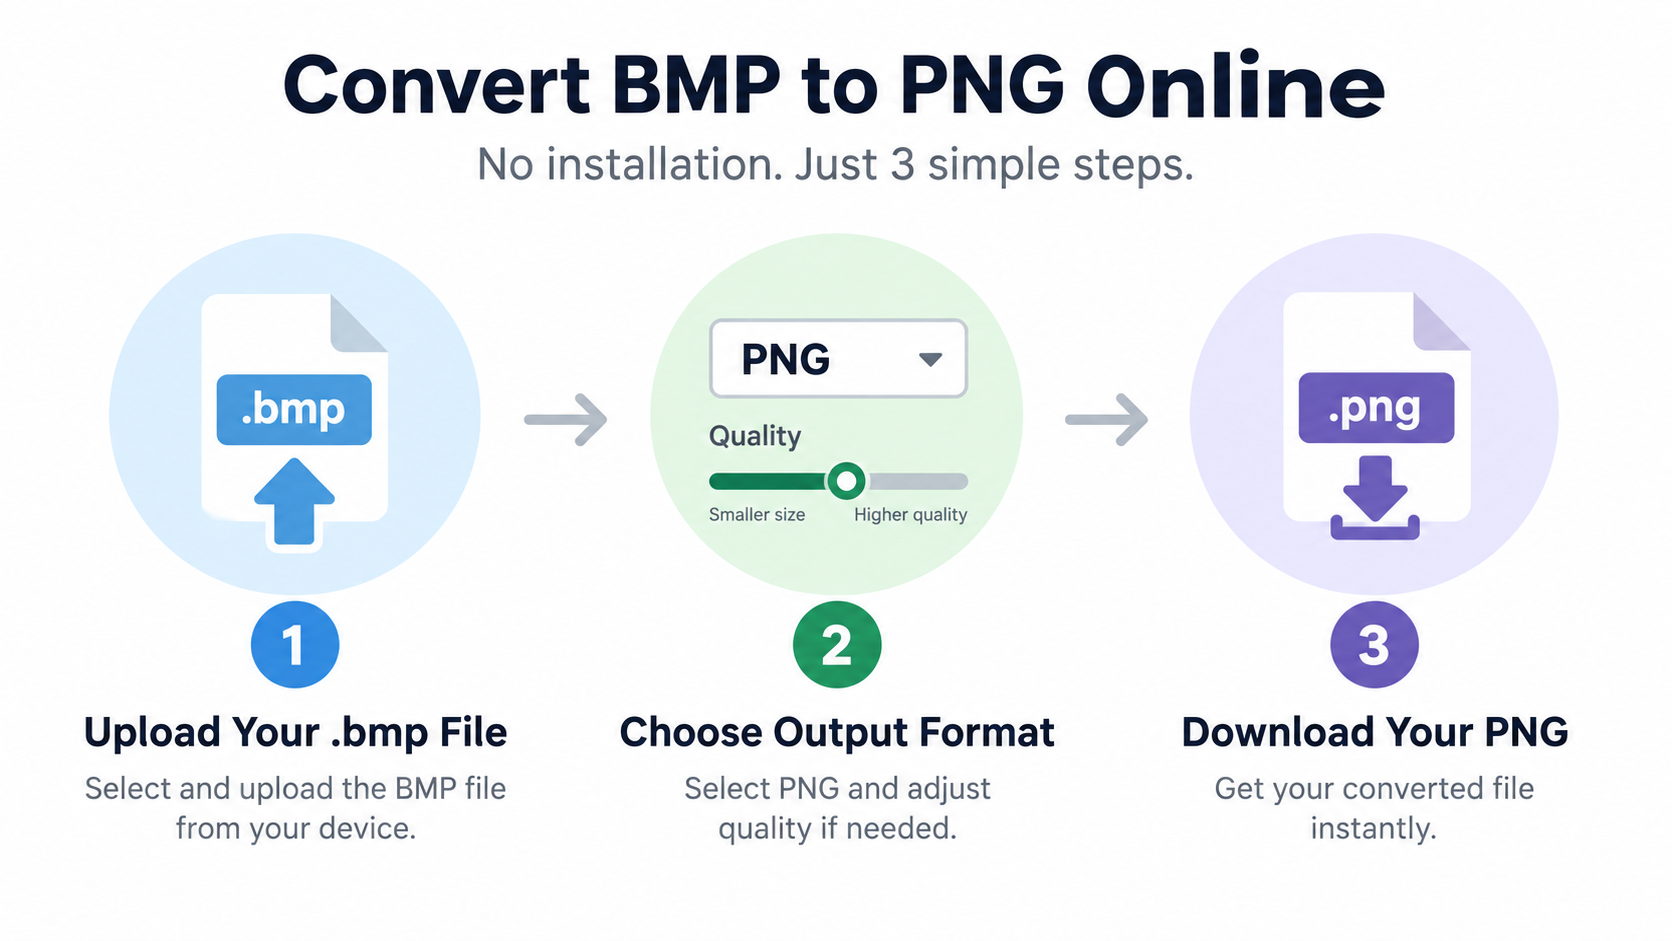
    Three-step online BMP compression flow

    Check the free-tier limits before you upload a folder. Aspose’s BMP Resizer allows a maximum of 5 files and 5 MB total per operation on the free tier, while CoolUtils accepts BMP files up to 50 MB. The gap between those two numbers decides which tool is usable for a given job.

    The online-versus-desktop trade-off is straightforward: online means no install and immediate use, desktop means higher or unlimited size ceilings, batch power, and full control over encoder settings. For a one-off screenshot, online wins. For a folder of 300 scans, it does not.

    How to Tell Whether a Tool Uploads Your File

    Look for two specific signals. First, whether the tool states that processing happens locally in your browser. Second, whether it publishes a retention window. Aspose states that documents are stored in secure storage for 24 hours and then deleted; CoolUtils states that both the source and result are deleted automatically after conversion, and in any case within 24 hours.

    A tool that says nothing about either is not automatically unsafe, but you have no basis for trusting it with confidential material. For CAD exports, medical scans, or anything under an NDA, use an offline desktop tool or a local script instead.

    One more check worth running: verify the tool actually re-encodes rather than merely resizing dimensions. A resizer can shrink the byte count by discarding pixels, which is a different operation with a different result.

    Batch-Compressing Dozens or Hundreds of BMP Files

    Single-file web converters do not scale. Uploading one file at a time is tolerable for three images and untenable for a folder of 200 scans or a nightly CAD export.

    Browser-based batch converters occupy a middle ground. BulkImagePro accepts up to 50 files per run, processes them locally in the browser, and packages the output as a single ZIP that downloads automatically. That ceiling is generous for a design team and irrelevant for a production archive.

    Choose by volume: under 20 files, use an online bulk image converter; 20–500 files, use a desktop batch tool; recurring or scheduled jobs, use a script or a watch folder.

    Desktop Batch Converters and ZIP Output

    Desktop tools remove the file-count ceiling and typically preserve folder structure, which matters when you are converting a directory tree rather than a flat list. reaConverter converts hundreds of BMP images at once, works entirely offline so nothing is uploaded, integrates with the Windows right-click menu, and supports Watch Folders for automated runs. Because there is no upload, the privacy question disappears entirely.

    Scripted Pipelines and Watch-Folder Automation

    For repeatable, version-controlled pipelines, command-line conversion is the most reliable option. reaConverter exposes all of its features from the Windows command line, and CoolUtils documents a command-line form for batch BMP-to-PDF work, with a /ProcessRecursively switch to include subfolders. Wrap the command in a batch file and schedule it.

    Watch Folder mode is the natural end state for recurring jobs: set the rules once, and every new BMP that lands in a directory is converted and filed automatically. That removes the manual step from the workflow entirely.

    Compression vs. Resizing: Hitting a Target File Size Without Losing Quality

    The distinction matters more than it sounds, because many tools labeled “compress BMP” only resize. Aspose’s BMP Resizer is explicit that it resizes — increasing or decreasing image dimensions — and does not perform byte-level compression. If a tool only scales pixels, it will never shrink a BMP at fixed dimensions, regardless of its label.

    Compression changes bytes. Resizing changes pixels. When a portal demands a file under 500 KB, you can work backward: choose the format first, then adjust the quality setting or the color depth, and only resize if you still miss the target. Tools that accept an explicit target size do this search for you; a compress BMP to 100 KB tool fixes the ceiling and adjusts quality automatically, and News Appite’s 500 KB compressor lets you enter any target in KB and automatically finds the highest quality that fits, reducing dimensions only when necessary.

    Does Compressing a BMP Reduce Image Quality?

    It depends entirely on the target format, not on the act of compressing. PNG, lossless WebP, and ZIP archival produce output that is pixel-identical to the original BMP. JPG and lossy WebP discard detail, and the artifacts appear first around text and hard edges. Judge lossy output at 100% zoom over a region containing text, not from a thumbnail.

    Stripping EXIF Metadata: Smaller and Safer

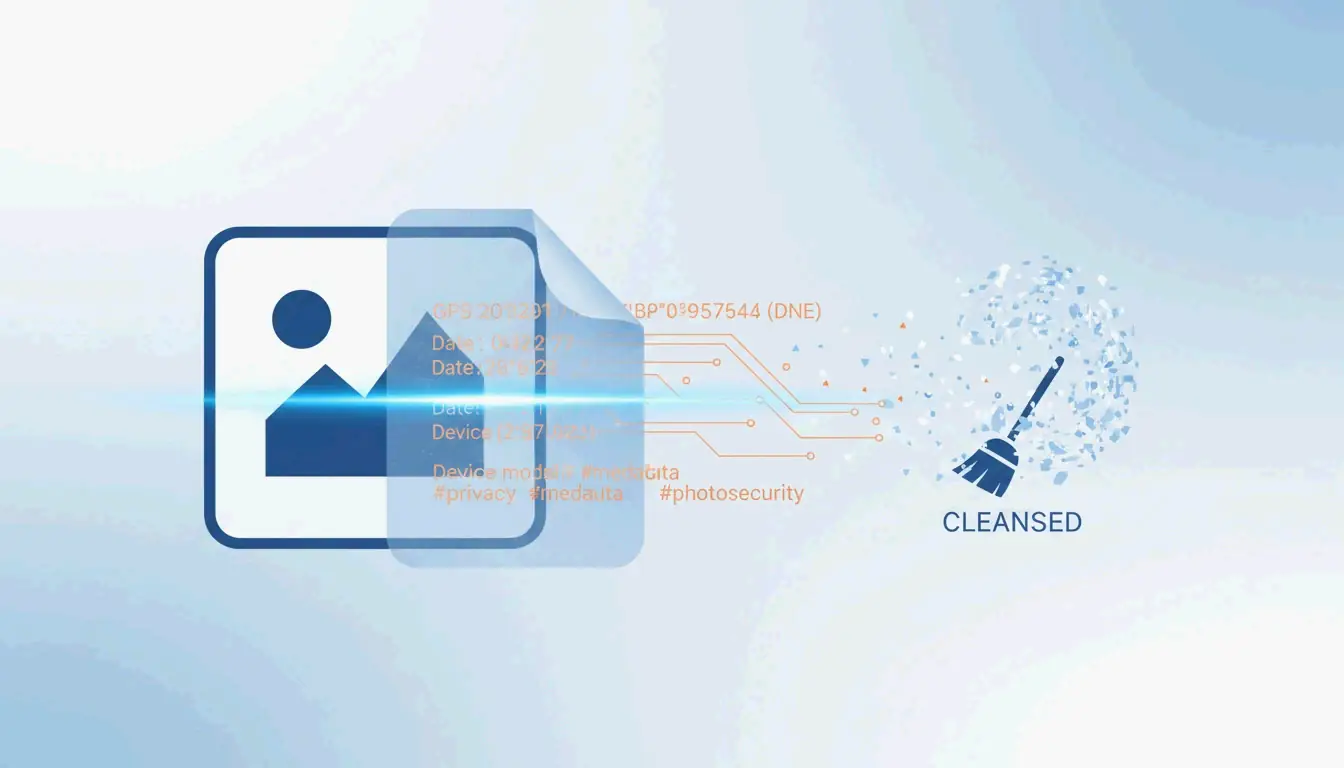
    Image files routinely carry EXIF metadata such as GPS location, camera model, and timestamps — CoolUtils notes that BMP uploads can carry this information. Removing it is a modest size win and a meaningful privacy win, particularly for photos taken on phones and shared publicly. Several browser-based tool suites include a dedicated EXIF remover alongside their conversion utilities.

    Conclusion

    You cannot meaningfully compress BMP in place. The format stores raw pixels by design, so the real savings come from re-encoding to PNG, WebP, or JPG, with ZIP or RLE as the only options when the .bmp extension must stay. Pick the target format by image type — PNG for screenshots and line art, JPG for photos, WebP for web pages, PDF for documents you need to archive. Run one file through a converter, compare the before-and-after size and the visual result at full zoom, then scale up to a batch tool or a scripted pipeline for the rest of the folder.

    FAQ

    Can I compress a BMP file without changing it to another format?

    Yes, but only modestly — the BMP specification offers no efficient compression of its own. Your options are ZIP, RAR, or Deflate archiving, RLE encoding for 4- or 8-bit indexed images, or dropping from 24-bit to 8-bit color. Expect far smaller savings than converting to PNG or WebP.

    Does compressing a BMP reduce image quality?

    It depends on the target format, not on the act of compressing. PNG, lossless WebP, and ZIP are lossless — pixels remain identical to the original BMP. JPG and lossy WebP discard detail, and artifacts show up first around text and hard edges. Always check lossy output at 100% zoom.

    How much smaller is a PNG or WebP than the original BMP?

    PNG typically cuts BMP file size by 60–80% with no quality difference, according to CoolUtils. WebP generally goes smaller still than PNG for the same image and quality level, especially at high resolutions. Multi-megabyte BMPs from 300 DPI scans can drop by well over 80% when re-encoded.

    Why is my BMP file so large in the first place?

    BMP stores every pixel literally as width × height × bytes-per-pixel, with row padding, and applies no compression. File size therefore scales directly with resolution and bit depth. A single A4 page is roughly 6 MB at 150 DPI and about 25 MB at 300 DPI as an uncompressed BMP.

    Can I batch-compress hundreds of BMP files at once?

    Yes. Browser-based batch converters handle about 50 files per run and deliver a ZIP download. Desktop batch tools and command-line scripts scale to thousands of files. For recurring jobs, a Watch Folder or scheduled script converts new BMPs automatically as they arrive, with no manual step.

    Is it safe to compress BMP files with a free online tool?

    Check two things: whether the file is processed locally in the browser, and what the retention policy says. Reputable tools state either that files never leave your device or a clear auto-delete window such as 24 hours. For confidential scans, CAD exports, or anything under an NDA, use an offline desktop tool or a scripted local pipeline instead.
  • How to Remove Watermarks from AI-Generated Images Safely: A 2026 Guide to Professional Results

    How to Remove Watermarks from AI-Generated Images Safely: A 2026 Guide to Professional Results

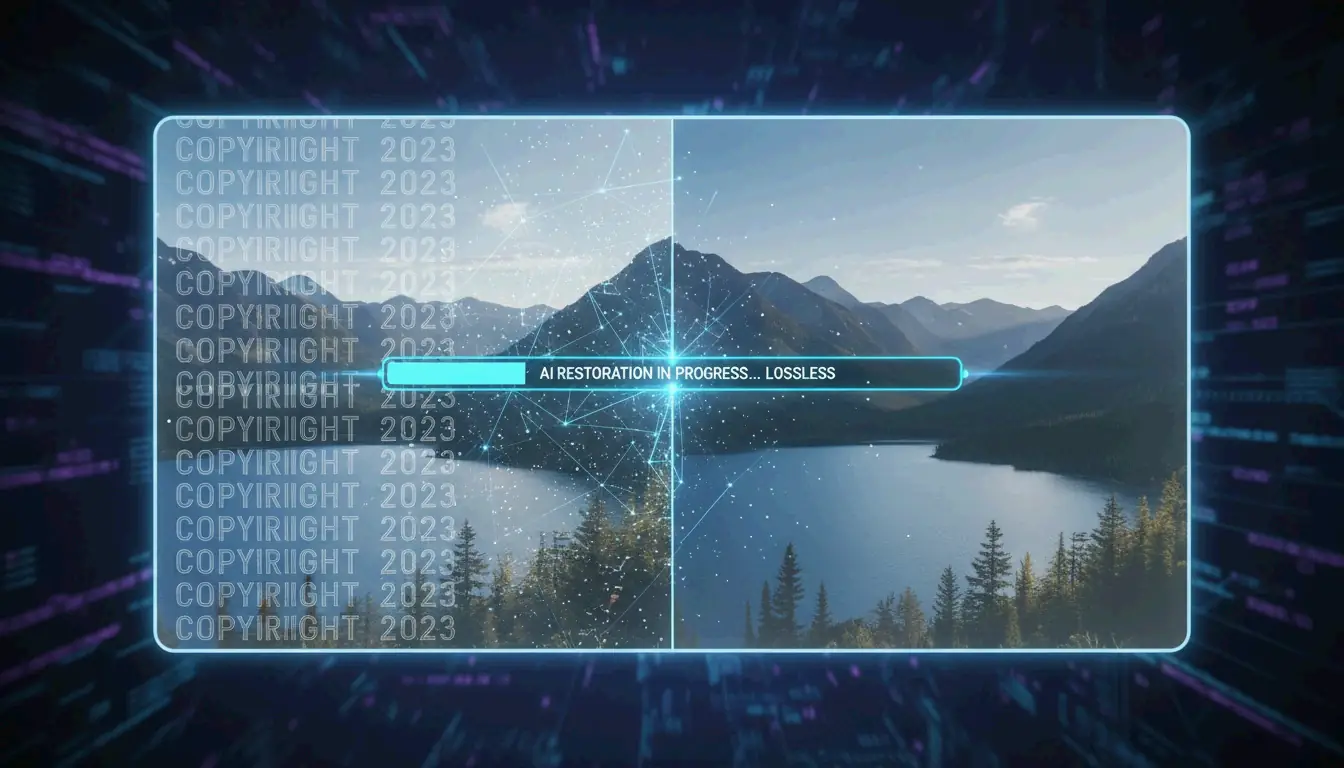
    Removing watermarks from AI-generated images in 2026 requires precision, not guesswork. Two professional approaches lead the field: Reverse Alpha Blending for lossless restoration of semi-transparent overlays, and AI Inpainting for complex background reconstruction. While visible logos can be cleanly removed, invisible markers like SynthID typically persist in the pixel data, which carries ethical and legal implications for commercial use.

    The 2026 Framework for Safe AI Watermark Removal

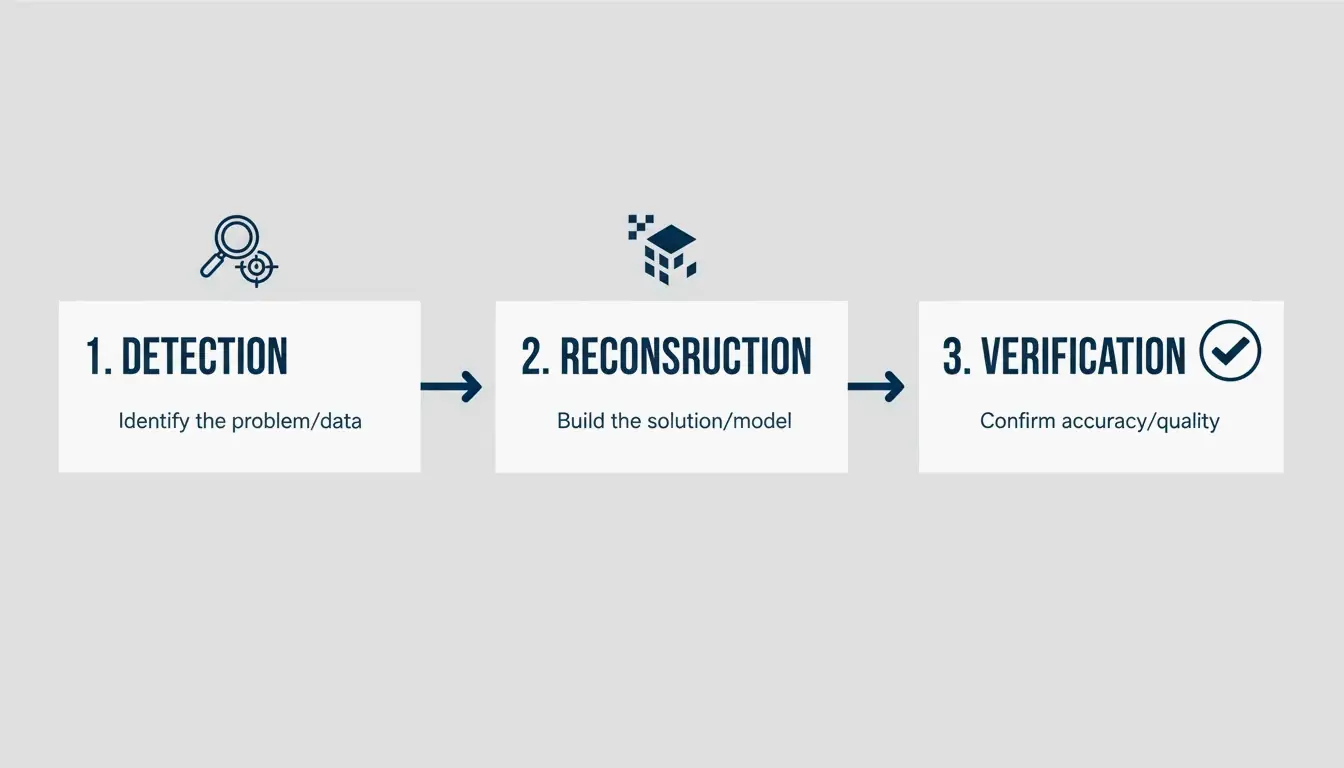
    Professional image restoration has evolved from crude clone-stamp edits into a structured three-step pipeline: Detection, Mathematical Reconstruction, and Metadata Verification. According to the Digital Media Institute, AI restoration tools are now 40% more accurate than their 2024 counterparts, making near-perfect pixel recovery a practical reality.

    Minimal 3-step workflow: Detect, Reconstruct, Verify

    AI-generated watermarks differ from traditional photo watermarks. Google’s four-pointed star and Meta’s “Imagined with AI” label are semi-transparent overlays, not solid logos. Cropping is not a professional solution because it destroys composition and clips edge details. A proper restoration rebuilds the underlying texture — skin, fabric, or gradient — rather than blurring over it.

    Step 1: Analyze the Watermark Type

    Watermark Type Characteristics Recommended Method
    Static / Opaque Logo Solid, non-transparent AI Inpainting (Content-Aware Fill)
    Semi-Transparent Overlay Partially see-through Reverse Alpha Blending

    Static marks require the software to predict and fill the missing background from surrounding pixels. Semi-transparent marks, common in Gemini outputs, are better suited to mathematical reversal, which calculates the original pixel values hidden behind the transparency layer.

    Step 2: Choose Reconstruction vs. Generation

    The background complexity determines the approach:

    • Simple backgrounds (clear sky, studio wall): Standard reconstruction works well.
    • Detailed patterns (foliage, faces, fabric textures): Generative models like Flux Klein 9B produce more natural results by understanding the image structure.

    Using Reverse Alpha Blending for Lossless Results

    Reverse Alpha Blending is the preferred method in 2026 because it restores original pixels rather than inventing new ones. The watermark layer follows a mathematical formula. By reversing that specific equation, tools recover the exact color and luminance values underneath.

    This method is particularly effective against the Google Gemini “Nano Banana” logo. As documented by GargantuaX on GitHub, this algorithmic approach avoids the “random” artifacts of generative fills — no soft edges or blurry patches.

    Practical example: An e-commerce seller used Liam with AI detection and reverse blending to clean dozens of supplier images. The Gemini Watermark Cleaner batch-processed logos without altering product colors or background textures, maintaining the quality required for a professional storefront.

    What Is SynthID? Understanding Invisible Tracking

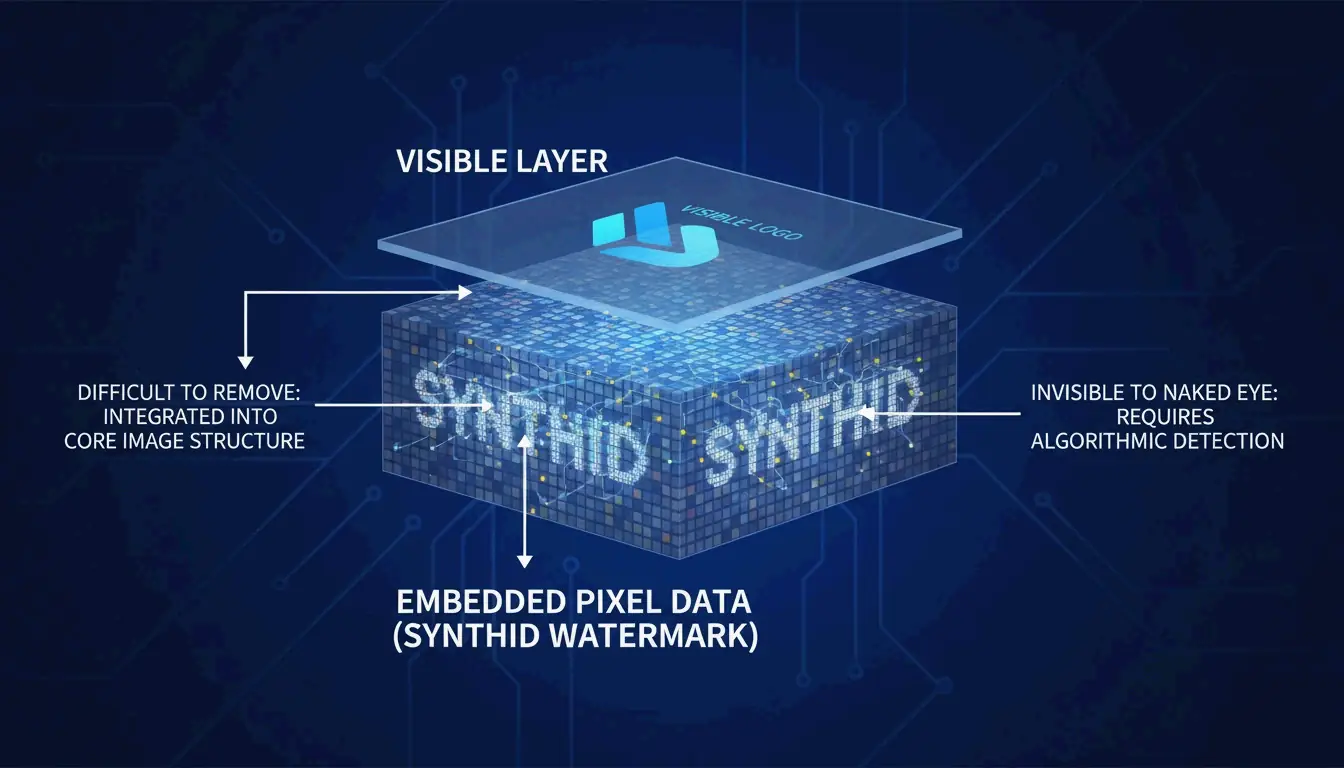
    Removing a visible watermark does not remove all traces. Google embeds SynthID, a digital watermark woven directly into the pixel data. Unlike a visible logo, SynthID is invisible to the human eye and engineered to survive cropping, resizing, and color adjustments.

    Concept diagram: Visible watermark layer vs. pixel-level SynthID

    Expert Wilnick Nemours emphasizes that removing the visual logo does not erase the digital history. SynthID persists at the signal level, meaning the image will still be flagged as “AI-generated” by professional tools and social platforms in 2026. This is relevant for SEO and platform transparency, as search engines increasingly prioritize AI content labeling.

    Professional Tool Comparison: GStory AI vs. Photoshop Content-Aware Fill

    Feature GStory AI Photoshop Content-Aware Fill
    Best For High-volume batch processing Precise manual control
    Core Logic Generative Reconstruction Neighboring Pixel Analysis
    Privacy Cloud-based processing Local-only (secure)
    Complexity Handling Tiled/complex watermarks Simple corner logos
    Pricing Model Credit-based Subscription

    According to Digen.ai, 85% of professional video and image suites now include generative AI as a standard feature.

    GStory AI excels at high-volume batch work with complex tiled watermarks using models like Flux Klein 9B. Photoshop Content-Aware Fill remains the reliable choice for sensitive data since all processing happens locally, though it can struggle with semi-transparent overlays on detailed textures.

    Privacy-First Workflows: Removing Watermarks Without Data Leaks

    For sensitive client work, free online tools pose a risk: they may store your images or use prompts for model training. A privacy-first approach uses local Python scripts or GitHub-hosted tools like the Gemini Watermark Remover extension, which processes everything on your device.

    When using browser-based tools, be cautious with Canvas Fingerprint Defenders. As noted in the GargantuaX repository, these privacy extensions can interfere with the mathematical precision needed for clean watermark removal.

    Privacy checklist:

    1. Use a dedicated browser profile for image work.
    2. Verify the tool does not require file uploads to a server.
    3. Test by disconnecting Wi-Fi — if the tool still works, processing is local.

    Conclusion

    Professional watermark removal in 2026 requires a two-part strategy: use mathematical tools like Reverse Alpha Blending for visual quality, and respect digital markers like SynthID for ethical and legal compliance. Start with a local tool like Gemini Watermark Cleaner for pixel-perfect accuracy on static logos. For large-scale content management, GStory AI’s credit-based system is more efficient. Always verify final metadata and disclose AI origins to maintain professional standards.

    FAQ

    Is it illegal to remove a Google Gemini watermark for personal use?

    Generally, removing a watermark for personal backups, archives, or private study falls under fair use. However, using the cleaned image commercially without disclosing its AI origin may violate Google’s Terms of Service or 2026 AI content labeling regulations. Always check the laws in your jurisdiction.

    Does removing a visible watermark also strip the invisible SynthID or metadata?

    No. While standard metadata (EXIF) can be stripped, SynthID is embedded in the pixel frequency itself. It is designed to survive visual edits including cropping and retouching. Only aggressive re-encoding might affect it, but that typically degrades image quality to an unusable level.

    How can I remove watermarks from AI-generated videos without flickering?

    To prevent flickering or warping, use tools that enforce Temporal Consistency. Instead of frame-by-frame editing, apply mask-tracking across the entire video sequence. In 2026, exporting the final video using the H.266 (VVC) codec is the recommended method to preserve the highest visual quality and stability in restored areas.

  • How to Resize Images for Social Media: 2026 Guide to Perfect Dimensions

    How to Resize Images for Social Media: 2026 Guide to Perfect Dimensions

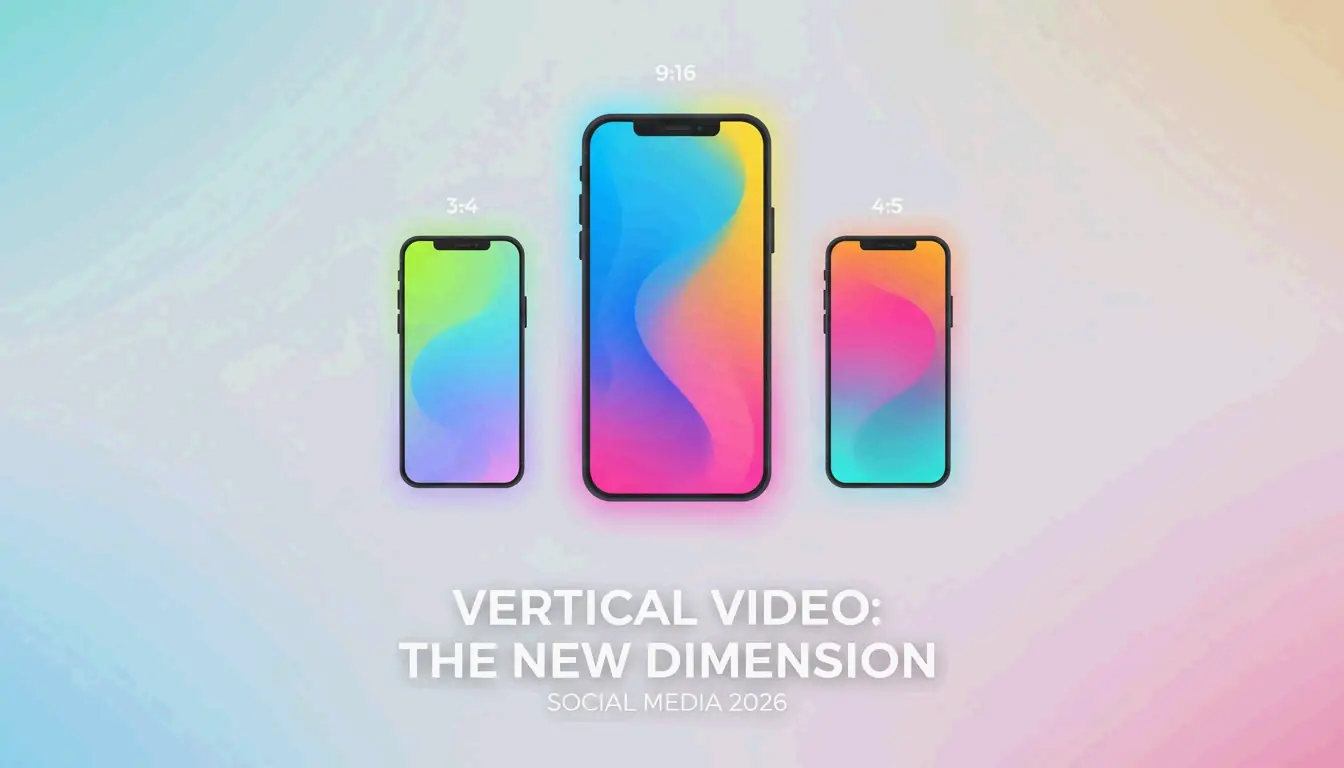
    To resize images for social media in 2026, focus on vertical formats: use 1080x1350px (4:5) for standard feeds and 1080x1920px (9:16) for Reels and TikTok. For Instagram grids, the new 1080x1440px (3:4) ratio is now standard. Always use the sRGB color profile and include C2PA metadata for any AI-generated content to ensure your reach is not restricted.

    The 2026 Vertical-First Framework: Master Aspect Ratio and Dimensions

    By 2026, the shift away from horizontal formats is complete. Data from Digital Applied 2026 shows that vertical content earns approximately twice the engagement of landscape posts. This aligns with mobile-first browsing behavior — most users do not rotate their phones.

    When resizing, think “fill,” not “stretch.” Stretching causes distortion. Instead, set your canvas to 1080px wide and crop your content to the correct height. This prevents the platform’s automatic compression from blurring your main subject.

    Complete 2026 Social Media Dimension Reference

    Platform Format Dimensions (px) Aspect Ratio
    Instagram Feed Post Portrait 1080 x 1350 4:5
    Instagram Square Post Square 1080 x 1080 1:1
    Instagram Story / Reels Full-screen vertical 1080 x 1920 9:16
    Instagram Profile Grid Portrait thumbnail 1080 x 1440 3:4
    TikTok Cover Full-screen vertical 1080 x 1920 9:16
    Facebook Shared Post Landscape 1200 x 630 1.91:1
    YouTube Thumbnail Landscape 1280 x 720 16:9
    LinkedIn Banner Wide landscape 1584 x 396 4:1
    X (Twitter) Post Landscape 1200 x 675 16:9

    Why Portrait Mode (4:5) Is the New Default for Feed Engagement

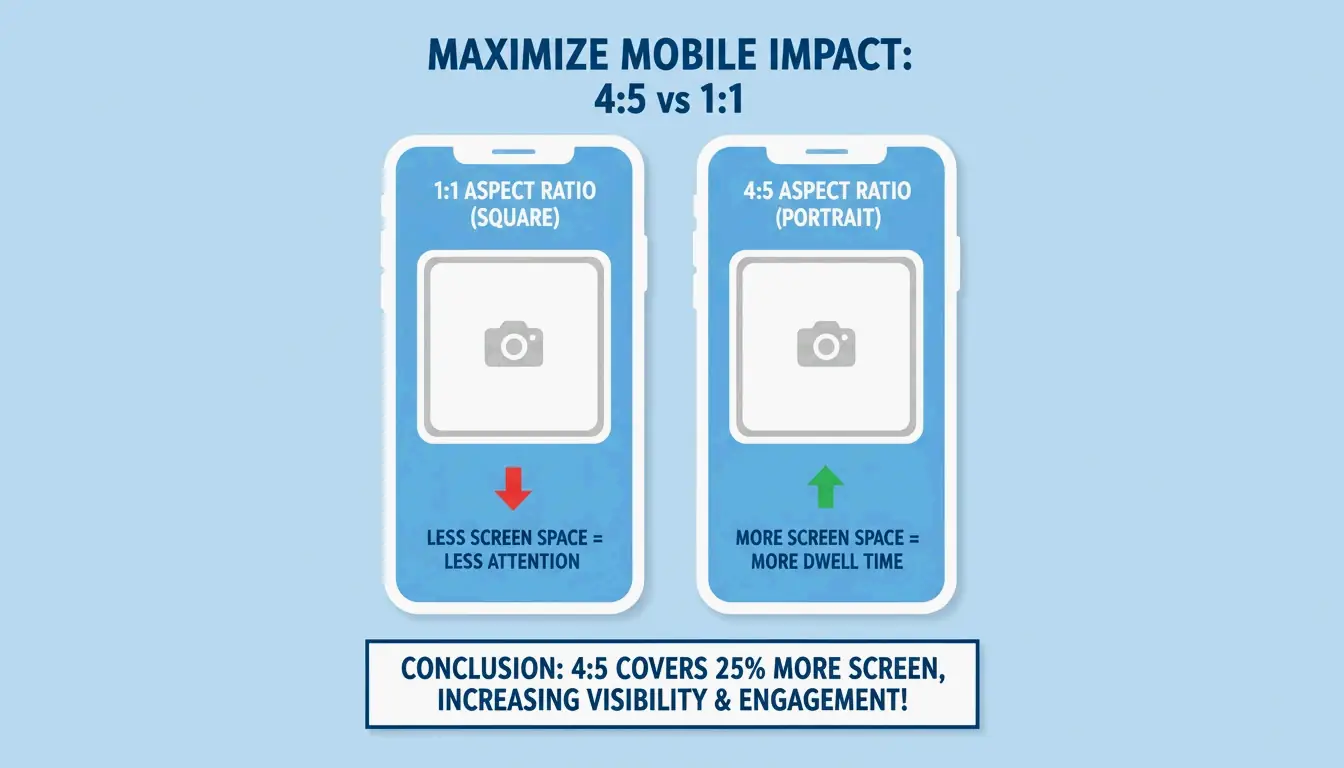
    The Portrait Mode (4:5) ratio at 1080x1350px has officially replaced the 1:1 square as the best choice for feed posts. It occupies approximately 33% more screen space on a smartphone. According to SocialBee, this extra height causes users to scroll for a fraction of a second longer, boosting dwell time and signaling the algorithm that your content is worth promoting.

    A side-by-side comparison of 1:1 square vs 4:5 portrait screen real estate

    Adapting to the New 3:4 Instagram Profile Grid

    A significant change rolled out through late 2025 and 2026 is Instagram’s move toward a 3:4 Grid Ratio. While feed posts display at 4:5, your profile grid now shows a taller 1080x1440px crop. If you are still designing for square thumbnails, your profile will look misaligned or awkwardly cropped. The best approach is to keep your main subject centered within the 1080x1440px area so it looks correct in both the feed and the profile grid.

    Platform-Specific Safe Zones: Avoiding UI Overlap in 2026

    Resizing is not just about outer dimensions — you must also account for Safe Zones. Even a perfectly sized 1080x1920px image is compromised if text is hidden under a “Like” button or account name. This is especially important given that Instagram Reels publishing has grown by 33% as of 2026.

    How to Resize for Instagram Reels and TikTok (1080x1920px)

    For full-screen vertical content (9:16), the standard resolution is 1080x1920px. However, your active display area is significantly smaller.

    Zone Area What to Avoid Placing Here
    Top 14% Camera icon, timer Text, logos
    Bottom 20-35% Captions, music info, interaction icons Text, watermarks, calls to action
    Right column Like, comment, share buttons Important visual elements

    To resize properly:

    1. Set the Canvas to 1080x1920px.
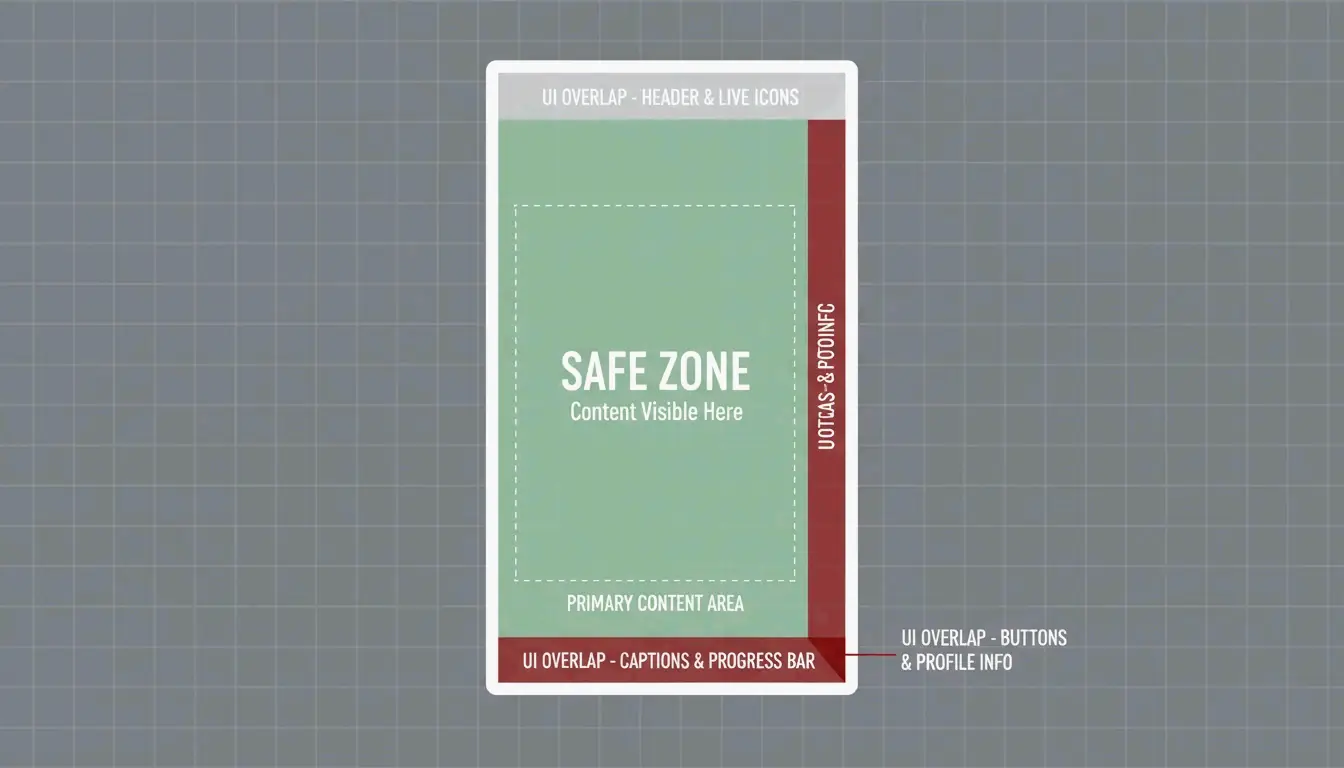
    2. Define the Safe Zone — keep text and logos inside a central 1080x1350px box.
    3. Check the Edges — Hootsuite suggests leaving about 14% of the top and 20-35% of the bottom clear of important elements.

    A 9:16 frame highlighting the central Safe Zone away from UI elements

    AI Compliance and Metadata: The New Rules for 2026 Content

    As of 2026, resizing for social media includes a new technical requirement: AI disclosure. Meta, TikTok, and YouTube use automated tools to detect synthetic content. If you use AI to “Generative Expand” a photo from square to portrait, you must follow transparency rules or risk the algorithm suppressing your post.

    Disclosing AI-Generated Content to Avoid Penalties

    If a photo looks real but was made or modified by AI, it needs an “AI info” label. Platforms use C2PA Metadata — essentially a digital nutrition label embedded in the file — to trigger these labels automatically. Digital Applied 2026 reports that failing to disclose AI content can cut your reach by up to 50%. When exporting resized images, ensure your software preserves this metadata, or manually select the AI label during upload.

    Platform AI Label Required? Penalty for Non-Disclosure
    Meta (Instagram/Facebook) Yes, for photorealistic AI Up to 50% reach reduction
    TikTok Yes, for AI-modified content Content flagged or hidden
    YouTube Yes, for synthetic media Label applied; repeated violations risk demonetization

    Technical Optimization: sRGB, WebP, and Compression Hacks

    The final step is selecting the right file format and color profile.

    Preventing Blurry Uploads: The sRGB and Compression Secret

    Social media apps compress files heavily to save bandwidth. To survive this second compression pass with quality intact:

    Setting Recommended Value Reason
    Color Profile sRGB Platforms convert to sRGB; other profiles cause washed-out colors
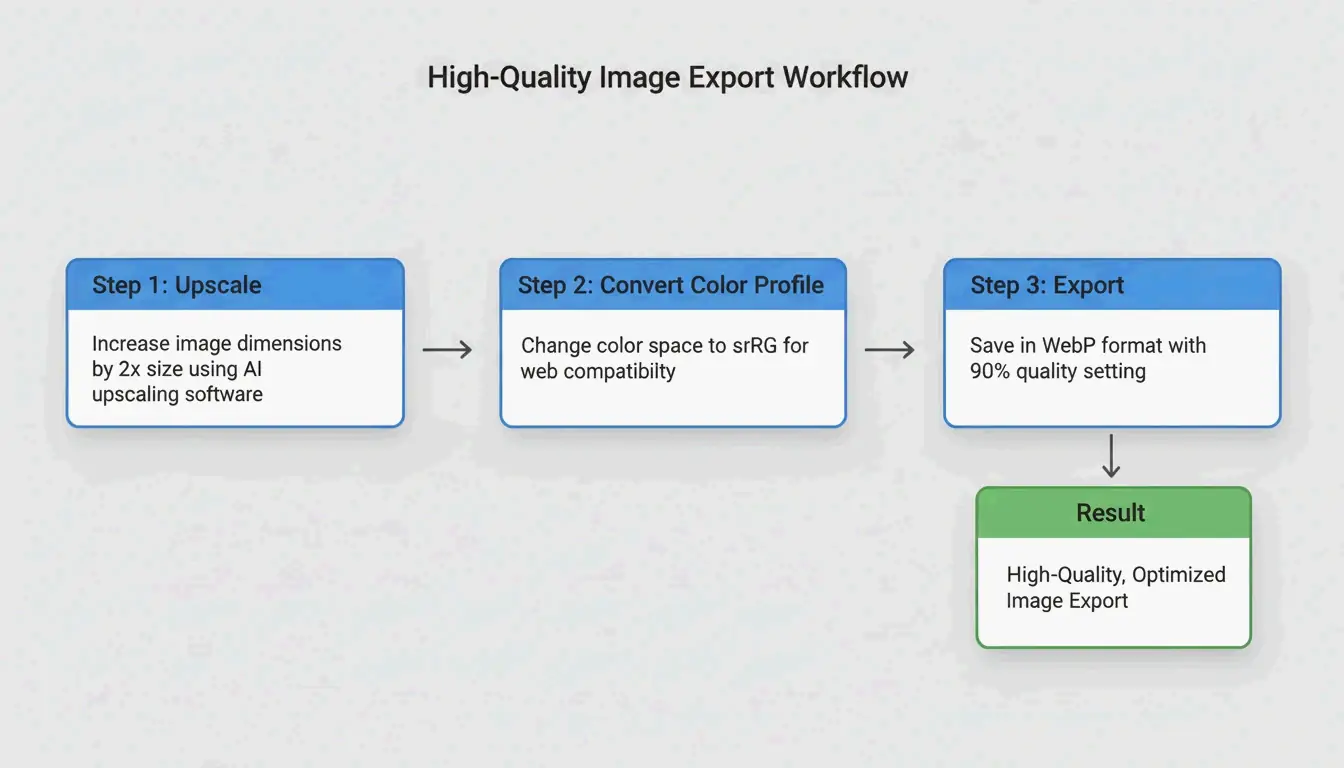
    Export Size 2x target (e.g., 2160x2700px for 4:5) Gives the platform data to compress from
    File Size Limit Under 30 MB (per Hootsuite 2026) Maximum allowed before platform rejection
    Format WebP Best quality-to-size ratio for social platforms
    Upload Quality “Upload at highest quality” toggle ON Prevents aggressive app-side compression

    A 3-step export workflow: Resize (2x), Profile (sRGB), Format (WebP)

    Best Tools for Automated Resizing in 2026

    Tool Strength Best For
    Meta Business Suite Cross-platform crop from one upload Facebook + Instagram simultaneously
    Canva Magic Switch Quick template format changes Non-technical users, rapid iteration
    Photoshop Generative Expand AI background fill for horizontal-to-vertical conversion Professional creators
    Landscape by Sprout Social Generate every crop for different networks in one click High-volume social media managers
    BIRME Client-side batch resize with privacy Bulk processing without server uploads

    Conclusion

    Resizing for social media in 2026 goes beyond pixel counts. To succeed, embrace the vertical-first world with 4:5 and 3:4 ratios for feeds and 9:16 for full-screen content. Account for Safe Zones so your message does not get buried under app UI, and stay compliant with AI disclosure requirements using C2PA metadata.

    Actionable Advice: Review your current brand templates. Replace any old 1:1 square defaults with 1080x1350px portrait versions, and verify that export settings are locked to sRGB so colors stay accurate on every screen.

    FAQ

    What happens if I use the wrong image size on social media in 2026?

    If your dimensions are incorrect, platforms will crop the image automatically, which often cuts off faces or brand logos. Posts with letterboxing (black bars on the sides) are frequently deprioritized by algorithms, resulting in lower visibility and a less professional appearance.

    Why does Instagram compress my high-quality images and make them blurry?

    This typically occurs when an image is wider than 1080px or uses the wrong color profile. Instagram downscales large files, which introduces blurriness. To fix this, upload in sRGB, keep the file under 30MB, and enable the “Upload at highest quality” setting in your Instagram preferences.

    Do I need to disclose if my social media images are AI-generated in 2026?

    Yes. Meta, TikTok, and YouTube now require “AI info” labels for photorealistic AI content. Failure to disclose can result in content being flagged or hidden, and your account may lose monetization capabilities. Tools that include C2PA metadata handle this automatically during the export process.

  • Why You Need to Remove EXIF Data Before Publishing Images on Social Media

    Why You Need to Remove EXIF Data Before Publishing Images on Social Media

    As of May 2026, you should remove EXIF data before publishing images on social media because many platforms retain your GPS coordinates in their internal databases for tracking, even if they hide them from public view. Specific sharing methods like WhatsApp “Document” mode and third-party scheduling tools often skip the cleaning process entirely, leaving your precise location visible to recipients or hackers.

    The Hidden Risks: Why You Need to Remove EXIF Before Publishing

    The main reason to strip metadata is that EXIF (Exchangeable Image File Format) acts like a digital fingerprint. It often contains GPS Coordinates that can pinpoint exactly where you were within a few meters. While big names like Instagram and X (Twitter) claim to protect you by filtering images, this is usually just a surface-level fix that does not apply to the data the companies keep for themselves.

    Understanding the “Internal Retention” Trap

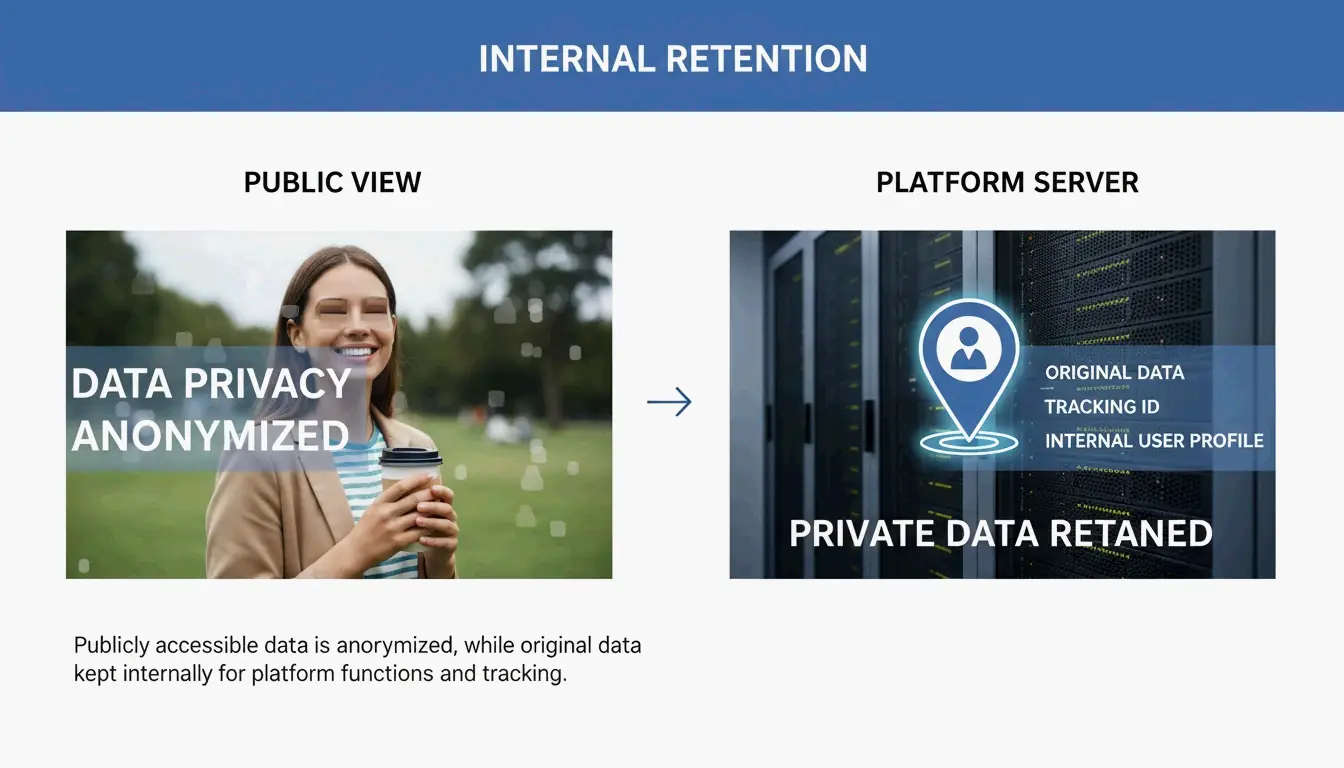
    A major risk in 2026 is that “stripping” data for the public does not mean the data is actually deleted. According to Fastio, the moment you upload a photo, the platform grabs the original, full file. Internal Retention policies at companies like Meta and X allow them to store your original GPS data for ad targeting and behavioral tracking, even if your followers never see those details.

    The contrast between what the public sees vs. what the platform stores

    Relying on a platform to clean your files is a reactive move that can fail. Take the Reddit HEIC Metadata Leak (Vulnerability #1069039) mentioned by SammaPix. In that case, photos in the HEIC format were converted to PNG during upload but accidentally kept their GPS tags. This exposed users’ home locations until a patch was finally released. If you remove the data on your own device first, the platform never gets that sensitive information to begin with.

    When Social Media Fails: Why Automatic Stripping Is Not Guaranteed

    You cannot just assume an upload button is a privacy filter. In 2026, whether your metadata stays or goes depends on how you share the file. Testing by MetaClean shows that while public feeds are mostly safe, private channels are much riskier.

    Sharing Method Platform EXIF Stripped? Risk Level
    Public feed post Instagram / Facebook Yes Low
    Standard photo share WhatsApp Yes Low
    Document mode WhatsApp No High — 100% metadata preserved
    “Best quality” DM Instagram / X Unreliable (23% GPS leak rate) Medium-High
    API upload (Buffer, Hootsuite) X (Twitter) Unreliable (30% device info retained) Medium-High
    • WhatsApp Document Mode: This is a major privacy trap. According to SammaPix, when you send a photo as a “Document” to keep the quality high, the app preserves 100% of the metadata, including your exact GPS location.
    • Direct Messages (DMs): On Instagram and X (Twitter), DM systems are not always as strict as the public feed. Tests show that sending photos in “best quality” or original format via DM can leak GPS data in about 23% of cases.

    The Social Media Manager’s Blindspot: API Posting Risks

    If you manage social media professionally, automation is your biggest danger zone. API Uploads — the tech used by tools like Buffer, Hootsuite, and Sprinklr — often bypass the standard cleaning steps built into official mobile apps. MetaClean’s 2026 testing found that images posted via the X API kept device model info in roughly 30% of cases, and GPS stripping was much less reliable than manual uploads. If you schedule content, you need to clean your files before they hit your queue.

    How to Remove EXIF Data: Step-by-Step Guide for Every Device

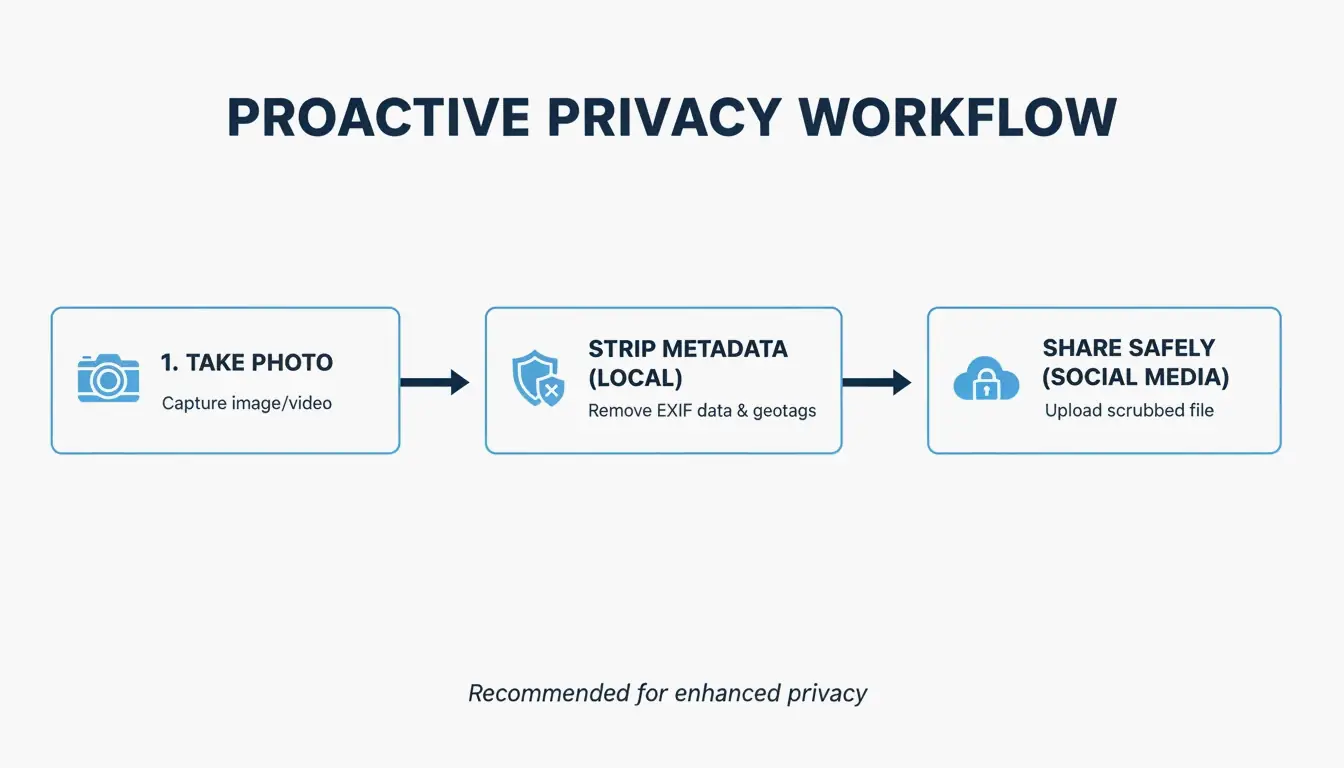
    To stay private, handle the metadata removal locally before the file ever leaves your phone or computer. As a bonus, ImgTweak notes that stripping metadata can shrink your file size by 10-20% without hurting image quality.

    Device Method Steps
    Windows Properties panel Right-click > Properties > Details > “Remove Properties and Personal Information”
    Mac Preview app Open in Preview > Tools > Show Inspector > GPS tab > “Remove Location Info”
    iOS Share Sheet Tap Share > Options > toggle off “Location”
    Android Gallery share Look for “Remove location data” toggle in share settings
    Pro/Power User ExifTool CLI Run exiftool -all= image.jpg to wipe every hidden header

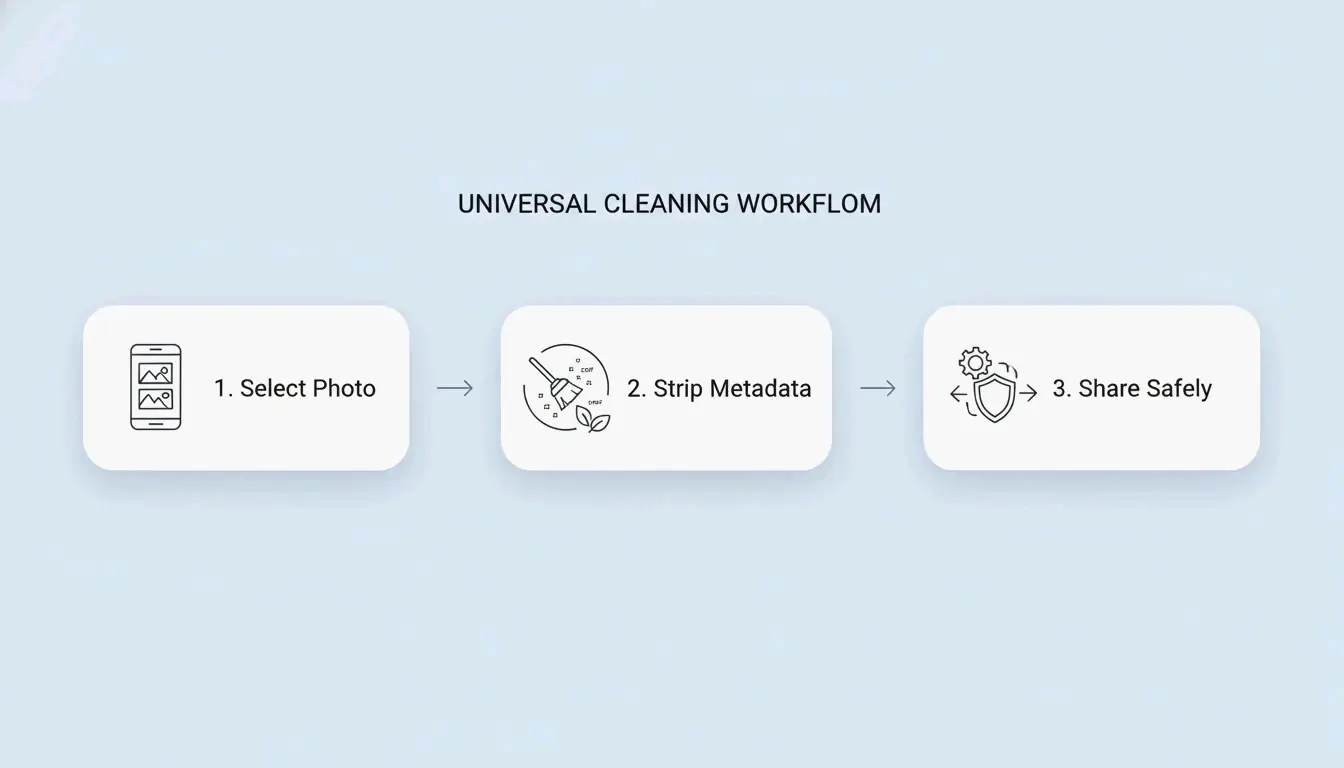
    Recommended 3-step privacy workflow

    Pro-Level Auditing: For power users, ExifTool is still the best option. The command exiftool -all= image.jpg completely wipes every hidden header in the file — EXIF, XMP, IPTC, and MakerNotes.

    Screenshotting vs. Stripping: Privacy vs. Image Quality

    Many people take a screenshot of a photo to “strip” the data. Since a screenshot is a brand-new file, it will not have the old EXIF info. This works for privacy, but it kills your resolution. A high-quality 48MP photo can drop to just 2-4MP. It is better to use a dedicated stripping tool so you can keep your high-res pixels while ditching the hidden tracking data.

    Method EXIF Removed? Resolution Preserved? Speed
    Screenshot Yes No (drops to 2-4MP) Instant
    ExifTool Yes Yes Fast (CLI)
    OS built-in tools Yes (partial) Yes Quick
    Dedicated app (e.g., ImageOptim) Yes (complete) Yes Moderate

    Privacy Leaders: Comparing Platform Metadata Policies in 2026

    The 2026 privacy landscape shows a big gap between “privacy-first” apps and data-hungry networks. According to the MetaClean 2026 Platform Comparison, Signal is the gold standard. It is the only major app that wipes all EXIF data before sending and stores nothing on its servers.

    Platform Public Feed DMs/Messaging Internal Retention Overall Rating
    Signal N/A Full strip None stored Best
    Instagram / Facebook Stripped for public Partial Retained for ad targeting Moderate
    WhatsApp N/A Stripped (photo mode) Retained by Meta Moderate
    X (Twitter) Stripped Unreliable Retained Moderate
    iMessage N/A Not stripped Stored on device/iCloud Poor
    Email (Gmail/Outlook) N/A Not stripped Stored on servers Poor

    On the other hand, Instagram and Facebook use a “Strip for the Public, Keep for the AI” approach. They hide your location from other users but use it themselves to build a profile on you. Meanwhile, iMessage and standard Email (Gmail/Outlook) offer almost no protection — they send the original file with all GPS data intact to whoever receives it.

    Conclusion

    Social media platforms might promise privacy, but EXIF data is still a massive loophole in 2026. Automatic cleaning is inconsistent, particularly when using professional scheduling tools, sending files as “documents,” or using high-quality DM settings. Most platforms also continue to harvest your location for their own use even after hiding it from the public. To truly protect your physical safety, use a metadata scrubber or a privacy-focused app like Signal before you share. Do not assume the platform is looking out for you; take control of your data before you hit upload.

    FAQ

    Does taking a screenshot remove EXIF data?

    Yes, taking a screenshot creates an entirely new image file that does not carry the original photo’s metadata. However, there is a significant trade-off: you will lose substantial image resolution and quality compared to using professional stripping tools that remove data while preserving the original pixels.

    Does WhatsApp remove GPS location when sending photos?

    It depends entirely on the sending mode. In 2026, standard “Photo mode” strips most data, but “Document mode” leaks 100% of EXIF data, including GPS. Additionally, “Best quality” mode is unreliable, with testing showing that GPS coordinates survive in roughly 23% of cases.

    Can law enforcement use EXIF data even if I delete the post?

    Yes. Most social media platforms retain the original uploaded file — including all its metadata — on their internal servers even after a post is deleted from public view. This retained data can be accessed by law enforcement through legal subpoenas or court orders directed at the platform.

  • Gemini Nano Banana 2 Image Watermark Remover: Best Tools and Techniques for 2026

    Gemini Nano Banana 2 Image Watermark Remover: Best Tools and Techniques for 2026

    To remove a Gemini Nano Banana 2 watermark in 2026, look for software specializing in Reverse Alpha Blending, such as GeminiWatermarkTool (offline) or GeminiWatermarkRemover.io. These tools offer pixel-perfect restoration of the visible 4-pointed star, though invisible SynthID and C2PA metadata will typically remain embedded for AI tracking.

    The 2026 Standard: How to Remove Gemini Nano Banana 2 Watermarks

    By 2026, the “Nano Banana” 4-pointed star has become the universal symbol for Google’s Gemini-generated content. These are not just simple “stamps” placed over an image; they are integrated using a process called alpha compositing. If you use a generic AI “eraser,” you will often end up with blurry smudges. To get a clean result, you need a workflow that reverses the math behind the original blend.

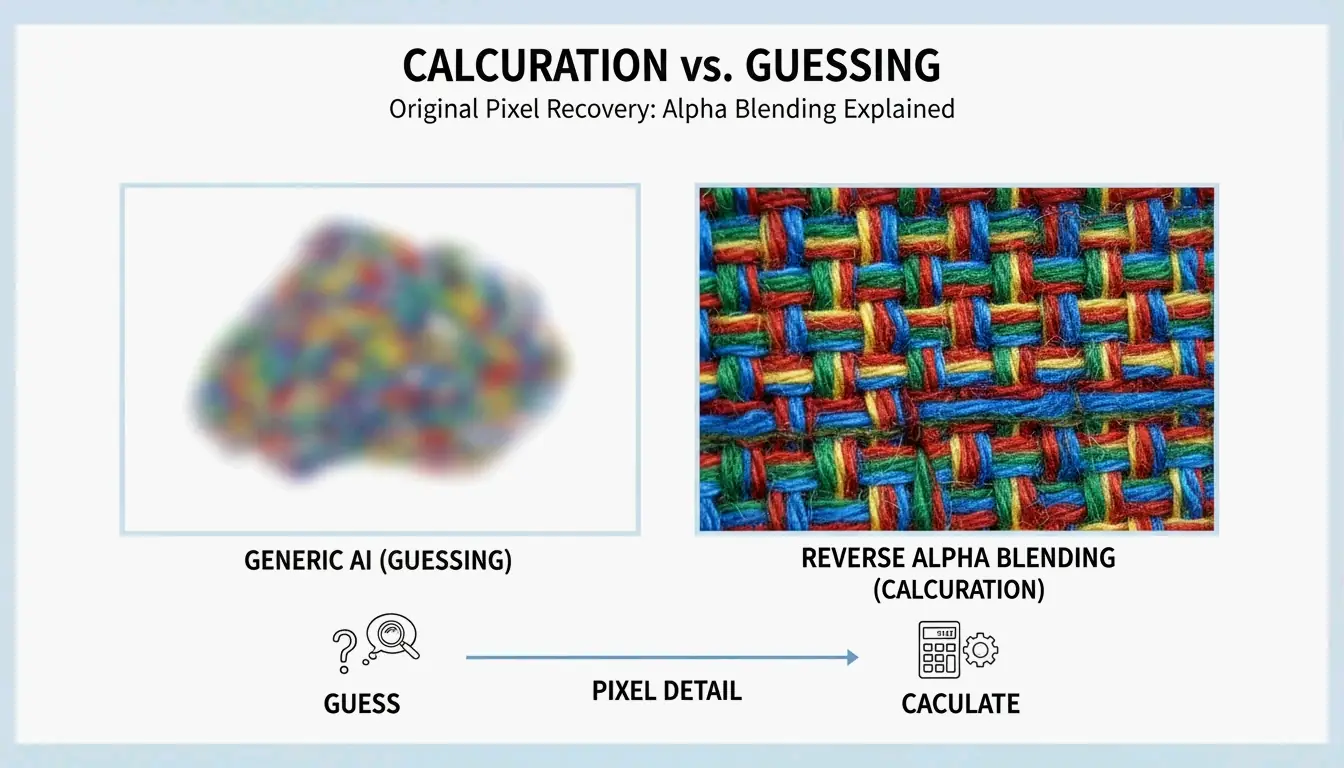
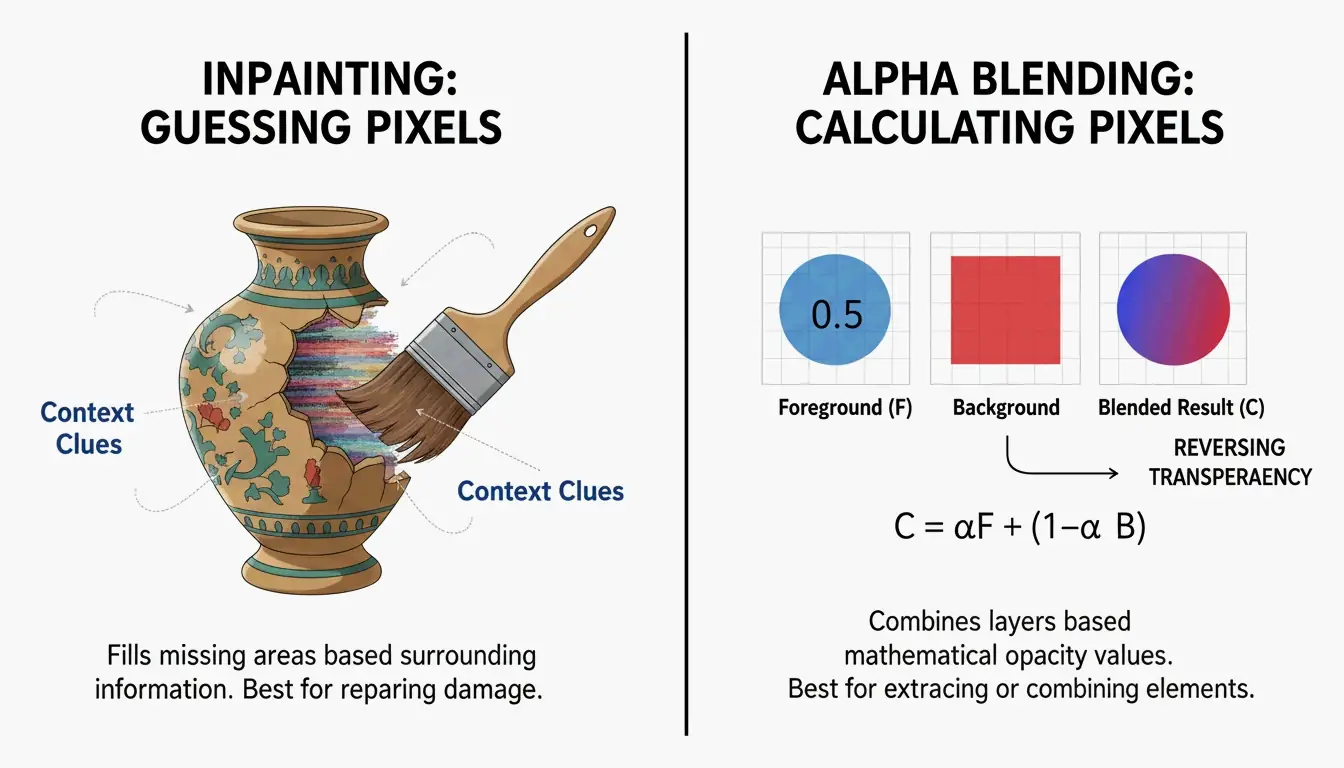
    Standard AI inpainting usually “guesses” what pixels should look like based on the background. In contrast, Reverse Alpha Blending subtracts the watermark’s values to recover what is underneath. This keeps fine details — like skin pores or the weave of a fabric — crisp and untouched.

    Comparison of standard AI guessing vs. Reverse Alpha Blending subtraction

    Step 1: Identify the Watermark Scale and Alpha Map

    The first step in a professional 2026 workflow is figuring out which version of the watermark you are dealing with. Technical guides from allenk’s GeminiWatermarkTool show that Google uses two main sizes based on the image resolution:

    Watermark Variant Image Size Position Dimensions
    Small (48x48px) Width or height <= 1024px 32px from bottom-right corner 48 x 48 pixels
    Large (96x96px) Width and height > 1024px 64px margin from bottom-right 96 x 96 pixels

    Modern tools like GeminiWatermarkRemover.io now use “Smart Detection” — a three-stage matching process — to lock onto these exact coordinates automatically.

    Step 2: Applying Reverse Alpha Blending for Lossless Restoration

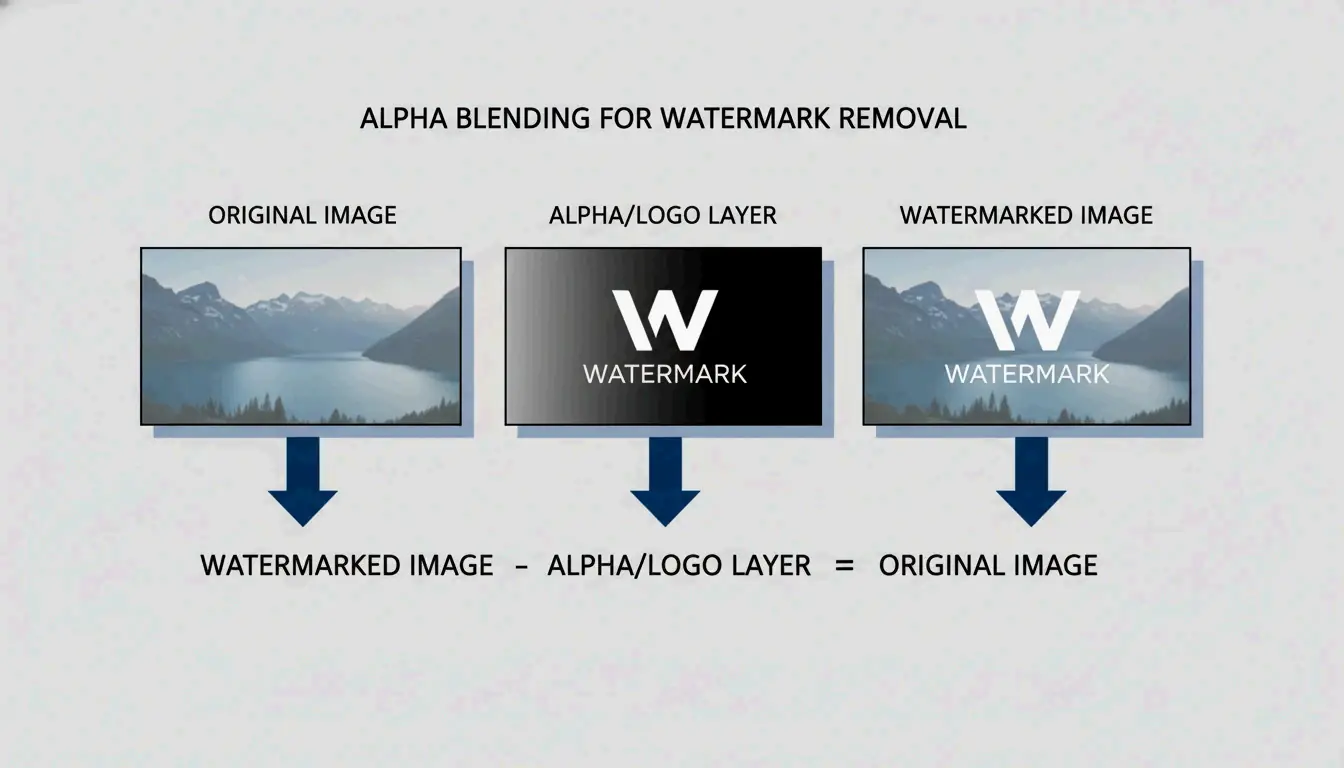
    Once the size is confirmed, the tool applies an inverse formula: Original = (Watermarked - Alpha * Logo) / (1 - Alpha). By using the exact transparency templates (alpha maps) Google uses, the software calculates the original color of the hidden pixels.

    For most users, this just means selecting “Reverse Alpha” mode in your settings. This method is “deterministic,” which means it gives you the same high-quality result every time, as long as the image has not been heavily compressed or resized.

    Best Tools for Gemini Nano Banana 2 Removal in 2026

    Your choice of tool depends on how many images you have and your privacy needs. In 2026, more people are moving toward local, offline processing to keep their AI-generated assets off third-party servers.

    The Pro Choice: GeminiWatermarkTool (CLI and Desktop)

    For developers and power users, GeminiWatermarkTool (allenk) is the top recommendation. It is a portable C++ app that works entirely offline. According to allenk’s documentation, it hits a restoration accuracy of plus or minus 1 per channel, making the removal invisible even if you zoom in 100%.

    The 2026 update includes a GPU-boosted feature called FDnCNN (Fast Discrete Convolutional Neural Network). This helps clean up any tiny “sparkle” artifacts left behind if the image was compressed. Thanks to Vulkan acceleration, it processes these areas in less than 5ms.

    Browser-Based Solutions: GeminiWatermarkRemover.io vs PixPretty

    Tool Type Privacy Best For
    GeminiWatermarkRemover.io Browser (client-side) 100% local Pixel-accurate removal of Nano Banana 2 star
    PixPretty AI Object Remover Browser + AI Cloud-assisted Watermarks on complex textures (hair, grass)

    If you just need a quick fix without installing software, GeminiWatermarkRemover.io is the best online option for pixel-accurate results. It runs 100% in your browser (client-side), so your image never actually leaves your computer. As noted by Emma Collins, PixPretty is a better choice if the watermark is sitting on top of something messy, like hair or grass. It combines reverse blending with heavy-duty AI retouching to fill in the gaps.

    Automated Workflows: Integrating MCP Servers and Claude Code

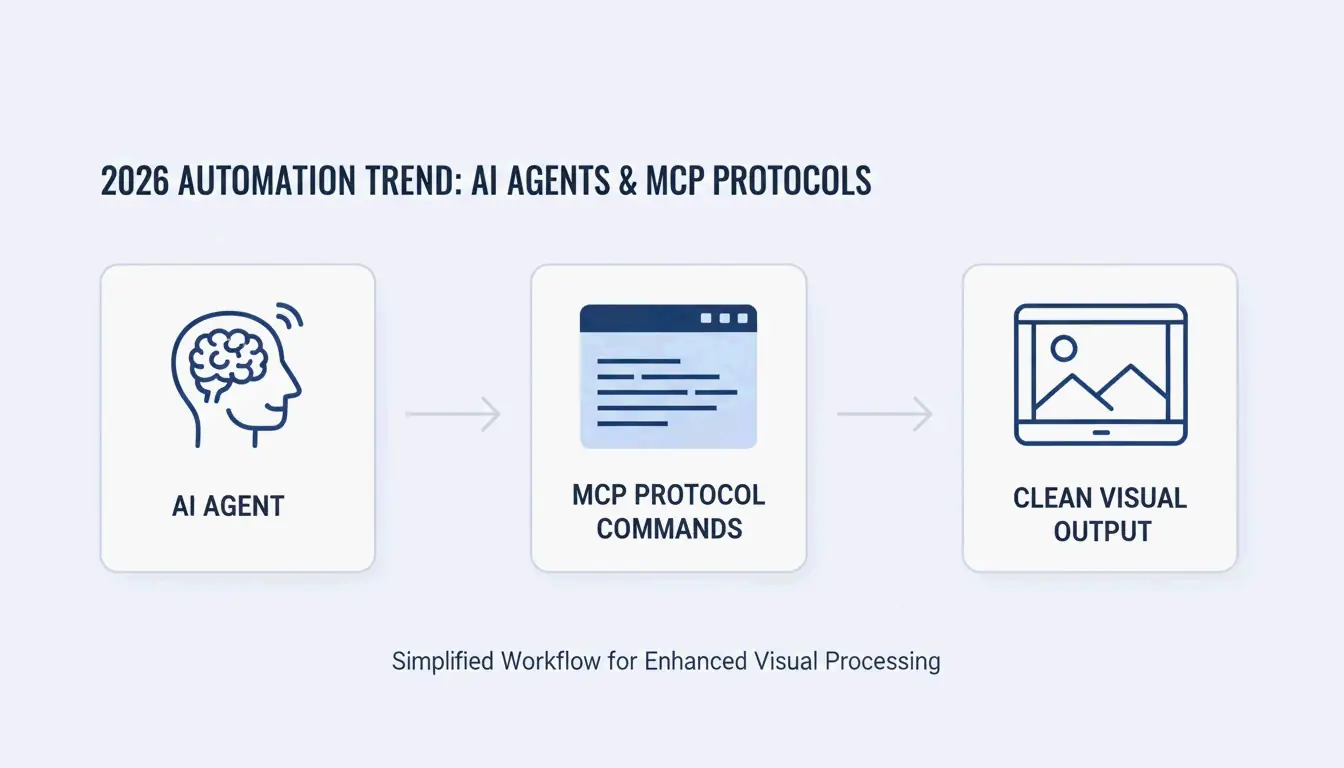
    A big change in 2026 is how we automate this. Using the Model Context Protocol (MCP), developers can link GeminiWatermarkTool directly to AI agents like Claude or Cursor. This allows an AI agent to “see” a watermarked image and automatically clean it with a simple remove_watermark command before it ever reaches your final document or UI mockup.

    Simplified automation: AI Agent to MCP Server to Clean Image

    Beyond the Star: Understanding SynthID and C2PA Metadata

    It is important to remember that the visible “Nano Banana” star is only one layer of tracking. Removing the star does not make the image untraceable.

    The Reality of SynthID

    SynthID, created by Google DeepMind, is an invisible watermark woven into the actual pixel frequencies. As Allen Kuo explains, SynthID is incredibly tough to get rid of because it is spread across the whole image. Most editing tools — even those that remove the visible star — will not scramble the SynthID enough to hide it from Google’s scanners.

    Layer Type Removable? Detection
    Nano Banana star Visible (alpha composite) Yes, via reverse blending Human eye
    SynthID Invisible (pixel frequency) Extremely difficult Google scanners
    C2PA metadata Cryptographic manifest Yes, via metadata scrubber C2PA-compliant platforms

    C2PA Compliance and Metadata Scrubbers

    Gemini images also carry C2PA metadata, which triggers “Made with AI” labels on sites like Instagram. While pixel-removal tools focus on the image itself, professional workflows in 2026 often use a separate “Metadata Scrubber” to wipe these digital manifests for internal company presentations.

    Hybrid Techniques for Resized or Compressed Images

    Reverse Alpha Blending is perfect on paper, but it needs “pixel-perfect” alignment. If an image was shrunk for a website or saved as a low-quality JPEG, the math fails, often leaving a faint “ghost” of the star.

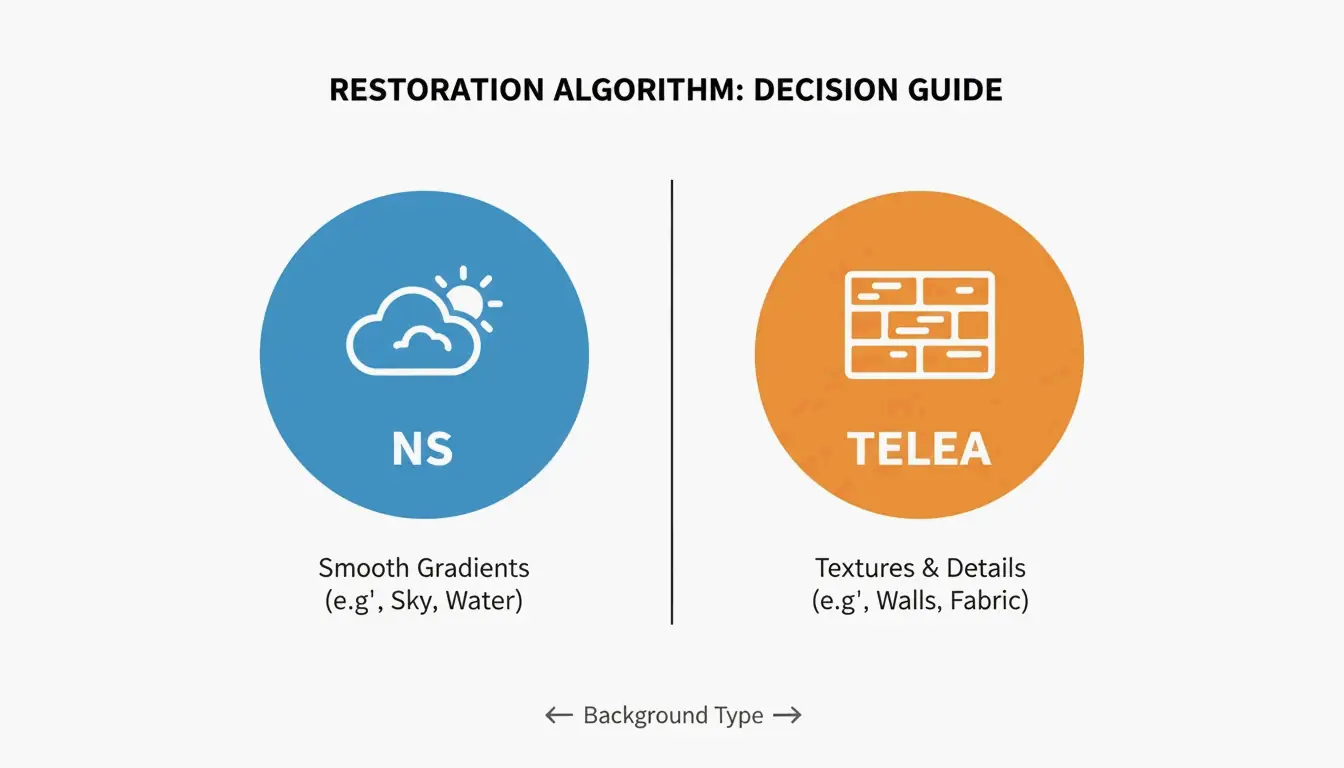
    Software Inpainting: When to use NS vs. TELEA algorithms

    When the math does not work perfectly, hybrid tools use “Inpainting” to tidy up. Choose your algorithm based on the background:

    Algorithm Best For How It Works
    Navier-Stokes (NS) Smooth areas (skies, blurred backgrounds) Flows surrounding colors into the spot
    TELEA Textured surfaces (concrete, wood, fabric) Fast pixel interpolation from boundaries

    Comparison of NS (Smooth) vs TELEA (Textured) application scenarios

    The “Smart Crop” Fail-Safe

    If the background is just too complex to fix, the Smart Crop Method is the most reliable backup. Tools like Wilnexo automate this by cutting a precise 56px to 128px strip off the bottom. It gets rid of the watermark completely, though it will slightly change the shape of your image.

    Conclusion

    The “Nano Banana” 2 watermark can be mathematically reversed with tools like GeminiWatermarkTool, but the invisible SynthID tracking is a permanent part of Google’s ecosystem. For the best results in 2026, use Reverse Alpha Blending rather than generic erasers to keep your image textures sharp. For pros, remember to use a C2PA-compliant scrubber if you need to clear the metadata. Just keep in mind: a clean-looking image is not the same as an anonymous one — SynthID can still be detected by specialized software even after the star is gone.

    FAQ

    Does upgrading to Gemini Advanced or Pro remove all watermarks automatically?

    No, Google maintains watermarks for AI safety compliance across all tiers, including paid subscriptions. Advanced and Pro users in 2026 still see the “Nano Banana” star on generated outputs. While some regions may offer “watermark-free” downloads for specific enterprise tiers, the default behavior for Gemini remains to include visible and invisible markers.

    Why can’t SynthID invisible watermarks be removed by standard editing tools?

    SynthID is embedded in the pixel frequency domain rather than being a surface-level overlay. It is adversarially trained to resist common transformations. Standard editing actions — such as cropping the visible star, adjusting colors, or adding noise — do not disrupt the underlying mathematical pattern enough to prevent AI detectors from identifying the image’s synthetic origin.

    Is it illegal to remove Gemini watermarks for professional client presentations?

    Legality depends on your jurisdiction and Google’s specific Terms of Service. Generally, removing watermarks for internal use or personal presentations is permitted. However, commercial redistribution may require “AI-generated” disclosure per C2PA standards. It is recommended to consult local intellectual property laws if you intend to use cleaned images for public-facing commercial advertisements.

  • The Principle of Removing Watermarks from Images: AI Algorithms vs Traditional Methods

    The Principle of Removing Watermarks from Images: AI Algorithms vs Traditional Methods

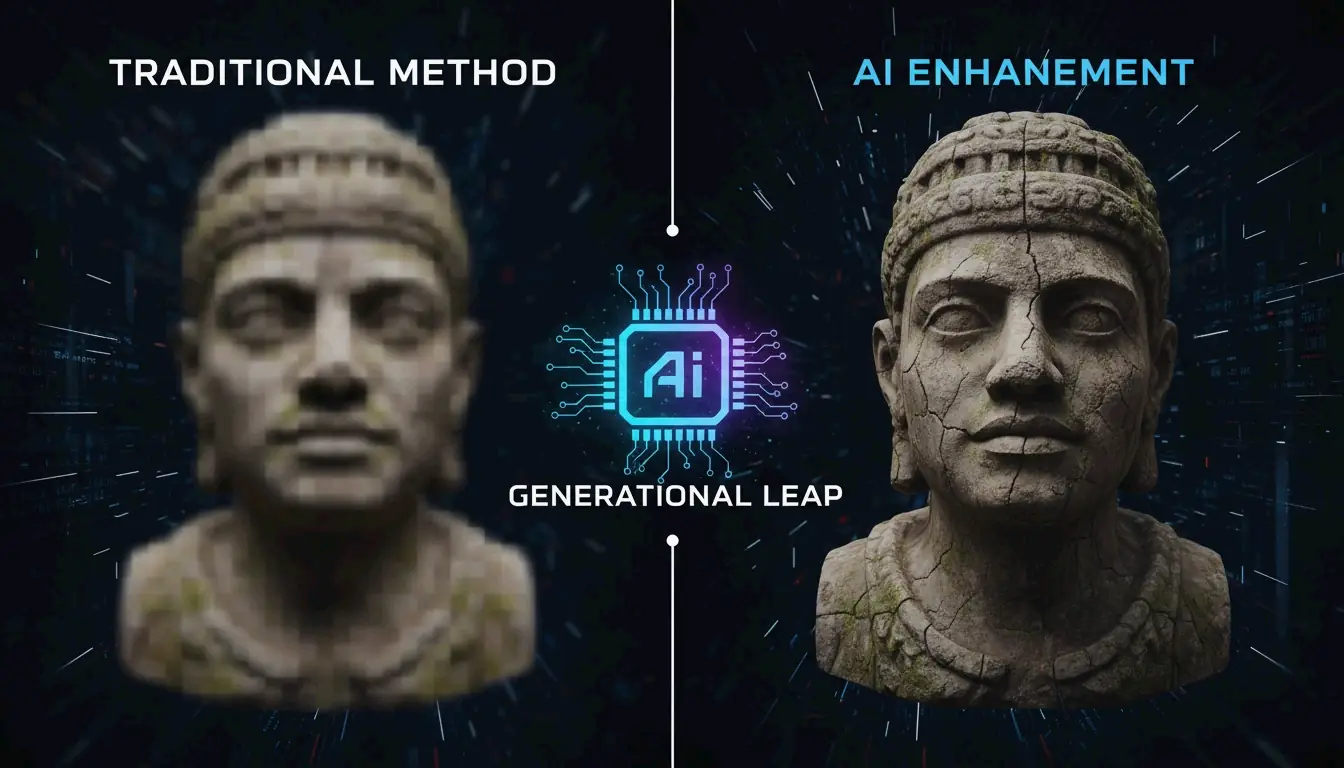
    As of May 2026, the principle of removing watermarks from images has shifted from manual cloning to AI algorithms like generative inpainting. While traditional methods rely on manual pixel replication, modern AI predicts missing data using GANs and Diffusion Models to recreate textures naturally. This evolution offers superior 8K quality and saves professionals over 4.5 hours weekly.

    Core Principles: How AI Algorithms vs Traditional Methods Remove Watermarks

    The real difference between AI algorithms and traditional methods is how they fill in the blanks. Traditional logic treats a watermark like a physical blemish to be covered up or a mathematical layer to be reversed. AI, however, sees the watermarked area as a “contextual gap.” It looks at the rest of the image to imagine what should be there, rather than just trying to scrub something off.

    According to a TechTrends Report, professionals using AI-native tools save about 4.5 hours every week compared to those still stuck with manual, frame-by-frame cloning.

    Method How It Works Best For Speed
    Manual cloning Copy-paste pixels from nearby area Simple, flat backgrounds Slow (manual)
    Reverse alpha blending Solve mathematical equation to recover originals Semi-transparent known watermarks Fast (automated)
    Cropping Cut off the watermark area Edge-positioned watermarks Instant
    AI inpainting Neural network generates replacement content Complex backgrounds, textures Fast (GPU-assisted)

    Traditional Logic: Solving the Alpha Compositing Equation

    Traditional tools often rely on Reverse Alpha Blending to bring back the original pixels. Think of it as a math problem. The software assumes the image follows a specific formula: Watermarked = alpha * Logo + (1 - alpha) * Original. If the tool can figure out the transparency (alpha) and the colors of the logo, it can calculate what the “Original” pixels were.

    Visual breakdown of the Alpha Compositing equation

    As seen in the Gemini Watermark Remover project, this works well for semi-transparent logos where the properties are known. But if the math is even slightly off, you are left with a “ghost” image or a blurry patch. Other old-school tactics include “Cloning” — literally stamp-copying pixels from one spot to another — or simply “Cropping” the edges of the photo to cut the watermark out entirely.

    AI Logic: Contextual Awareness via Deep Learning

    AI-driven removal uses AI Inpainting to build entirely new pixels. Instead of just moving existing data around, AI models study patterns, lighting, and textures to “hallucinate” a realistic background. Tools like Pixelbin use these deep learning models to detect and remove marks automatically, so you do not have to do it by hand.

    By 2026, this technology has moved to edge computing and high-speed cloud connections. This allows complex neural networks to clean up high-resolution media almost instantly. Unlike a simple blur, AI inpainting keeps the original grain and detail of the shot, making the fix nearly impossible to spot.

    The Technical Deep-Dive: Generative Adversarial Networks (GANs) and Diffusion Models

    In 2026, the tech battle between watermark creators and removers is fought using two main types of AI architecture: GANs and Diffusion Models.

    GANs and Discriminator Architectures

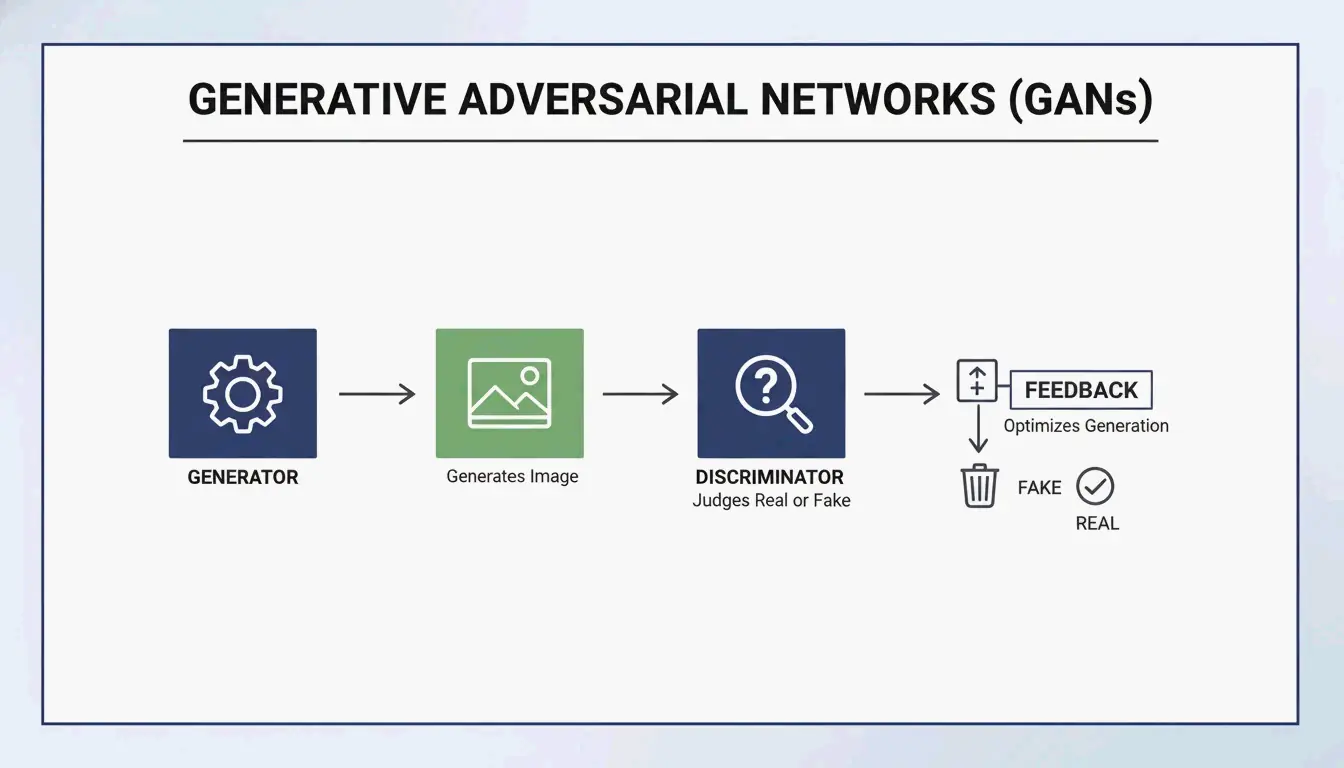
    Generative Adversarial Networks (GANs) work like a competition between two AI models. One (the encoder) tries to rebuild the missing background, while the other (the discriminator) tries to catch the mistake by comparing it to a real image. This “argument” between the two forces the AI to create incredibly realistic textures. As Side-Line points out, GANs are a staple in modern “encoder-decoder” setups, helping to hide or remove identifiers with minimal impact on how the image looks.

    GAN architecture: the adversarial logic of generator vs. discriminator

    Diffusion Models: The 2026 Gold Standard

    Diffusion Models are now the go-to for high-quality reconstruction. They work by “denoising” an image. Since a watermark is essentially a structured pattern that does not belong in a “natural” image, the model treats the watermark as noise and cleans it away.

    Research from NeurIPS Researchers shows that even invisible watermarks can be removed using these models without ruining the image quality. To check the results, experts look at PSNR and SSIM metrics. A top-tier AI restoration, like those using the ROBIN Framework, can hit an SSIM score of 0.98. At that level, the output is basically identical to the original, non-watermarked file.

    AI Architecture Strength Quality Metric Limitation
    GANs Fast, realistic textures Good PSNR Can create artifacts in complex scenes
    Diffusion Models Highest fidelity SSIM up to 0.98 Slower processing
    Hybrid (GAN + Diffusion) Balanced speed and quality PSNR + SSIM Requires more compute

    Is Removal Truly Lossless? Understanding Reverse Alpha Blending

    Marketing teams love the word “lossless,” but the reality is more nuanced.

    Reverse Alpha Blending is mathematically lossless, but only if you have the exact mask and alpha values. Older methods using Discrete Cosine Transform (DCT) often struggle when an image is compressed. Because DCT marks follow fixed math rules, they are easy targets for removal attacks that know exactly how those rules work.

    AI “hallucination” is not technically lossless because it is creating new pixels rather than finding the old ones. However, in the 2026 landscape — where 85% of pro video suites use generative fill according to the Global Digital Media Institute — the results are considered “perceptually lossless.” Thanks to 6G speeds, we can now process 8K media without the messy compression artifacts that used to ruin these edits.

    The 2026 Arms Race: C2PA Standard and Watermark Forgery

    As removal tools get better, the industry is fighting back with new standards, though new risks like WMCopier have also appeared.

    • WMCopier and Forgery: Research from Zhejiang University (2025) highlighted WMCopier, a tool that can “strip” a watermark from one image and “paste” it onto another. This makes it easy to forge ownership, making illicit content look like it came from a legitimate source.
    • C2PA Standard: To stop this, the C2PA Standard was created. It pairs watermarks with cryptographically signed metadata. Even if an AI removes the visual logo, a hardware-level signature stays in the file’s data to prove where it came from.
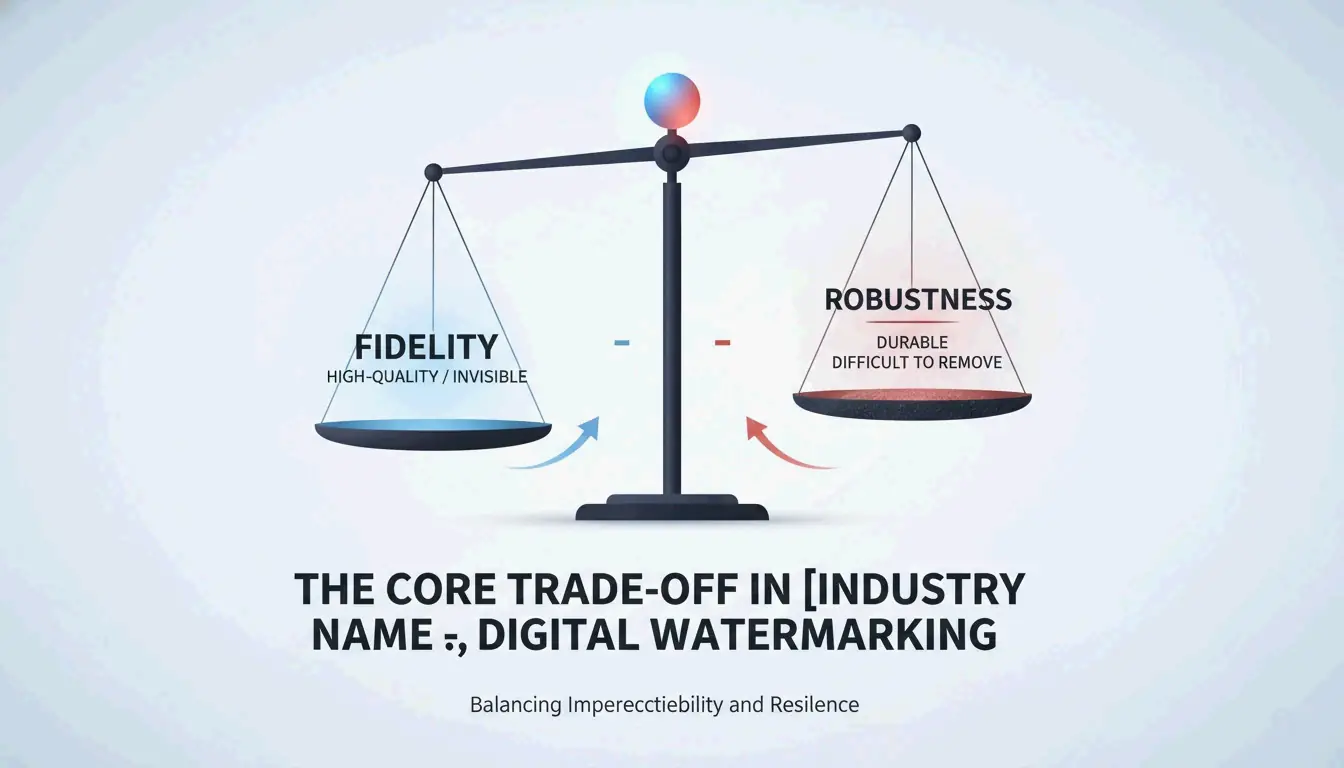
    • Fidelity-Robustness Trade-off: This is the big challenge. If you make a watermark too strong (robustness), it starts to look ugly (low fidelity). Modern defenses like Adversarial Robustness Testing (ROBIN) now train watermarks specifically to survive the “regeneration attacks” used by diffusion models.

    Core comparison: Fidelity vs. Robustness trade-off

    Conclusion

    Watermark removal has come a long way from basic pixel-copying to advanced neural reconstruction. While math-based methods like Reverse Alpha Blending still have a place for simple overlays, AI Generative Inpainting is the only real choice for the complex, high-res media of 2026. We are now in an era of the “Fidelity-Robustness Trade-off,” where the goal is to make markers invisible to people but obvious to forensic software. For pros, tools like Pixelbin are essential for speed, but it is always wise to check outputs against C2PA standards to stay ethical and prove your content is the real deal.

    FAQ

    Does removing a watermark with AI affect the final image resolution?

    Modern AI algorithms in 2026 maintain the native resolution of the image. By using super-resolution upscaling and contextual inpainting, tools like Pixelbin fill the watermark gap without changing the pixel dimensions. Unlike traditional cropping, which reduces the frame size, AI reconstruction ensures the final output remains high-definition or 8K.

    Can AI remove invisible forensic watermarks like SynthID?

    While AI can easily remove visible layers, forensic markers like Google’s SynthID are embedded deep within the pixel distribution. Diffusion-based “regeneration attacks” can attenuate these signals, but they are often difficult to strip entirely without degrading image quality. Furthermore, C2PA-compliant metadata provides a secondary layer of protection that persists even if the visual pixels are altered.

    What is the fidelity-robustness trade-off in digital watermarking?

    The fidelity-robustness trade-off is the balance between making a watermark invisible to the human eye (fidelity) and making it difficult to remove (robustness). AI has disrupted this balance; traditional frequency-domain marks are now easily detected and removed by neural networks, forcing developers to use adversarial training to hide watermarks in regions that AI models are less likely to modify.

  • How to Remove EXIF Metadata Before Sharing Photos: Privacy Guide (2026)

    How to Remove EXIF Metadata Before Sharing Photos: Privacy Guide (2026)

    Every digital photo contains 80-120 hidden metadata fields including GPS coordinates, camera serial numbers, and editing history. Remove EXIF metadata before sharing using built-in OS tools (Windows Properties, Mac Preview), mobile options (iOS share sheet, Scrambled Exif for Android), or batch tools (ExifTool). In 2026, also strip C2PA AI credentials and MakerNotes for complete privacy.

    Quick Reference: EXIF Removal by Platform

    Platform Method What It Removes Limitation
    Windows 10/11 Right-click → Properties → Details → “Remove Properties” All standard EXIF fields Creates a copy, original untouched
    macOS Preview → Tools → Show Inspector → GPS → “Remove Location Info” GPS coordinates only Leaves color profiles, device tags
    macOS (full) ImageOptim or ExifTool All EXIF, XMP, IPTC, MakerNotes Requires third-party tool
    iOS Share sheet → Options → toggle off “Location” GPS only per-share Must repeat each time
    Android Scrambled Exif (F-Droid) or Samsung Gallery toggle All EXIF fields Requires app install

    3-step workflow for cleaning photos before sharing

    Why Photo Metadata Is a Security Threat

    A single smartphone photo holds 80-120 metadata fields revealing exact altitude, camera lens serial number, and GPS coordinates. Fast.io cites the 2012 John McAfee case — his Guatemala location was leaked when Vice published a photo with GPS data still attached.

    Per MetaClean, 89% of documented OSINT cases used image metadata as critical evidence — data not visible in the photo itself.

    Beyond GPS, XMP & IPTC tags can reveal your full name, editing software, and OS version — useful for social engineering and phishing.

    2026 Platform Privacy Matrix

    Platform Strips EXIF on Upload? Key Exception
    Instagram / Facebook Yes “Made with AI” tags may persist
    WhatsApp Yes “Document Mode” preserves all data
    Telegram Yes “File Mode” leaks full EXIF
    iMessage No Transmits original with full GPS
    Discord No Preserves EXIF including GPS
    Signal Yes Removes all metadata by default

    The Document Mode Trap: Sending photos as “documents” in WhatsApp/Telegram to preserve quality skips automatic cleaning — GPS coordinates go straight to the recipient.

    Advanced Stripping: MakerNotes and C2PA

    MakerNotes: The Hidden Thumbnails

    Camera manufacturers embed proprietary “MakerNotes” that can include unique device identifiers and hidden thumbnails of the original uncropped photo. The Thumbnail Trap occurs when you crop an image but the embedded EXIF thumbnail remains unchanged — Konvrt reports cases where people accidentally shared the full uncensored version through this oversight.

    C2PA Content Credentials (2026)

    AI-generated or edited images now carry C2PA Content Credentials. Platforms like Pinterest and Instagram use these to label content as “Made with AI.” Removing these requires an AI Metadata Cleaner — standard EXIF tools don’t touch C2PA signatures.

    ExifTool: Batch Command-Line Stripping

    For bulk operations, ExifTool removes everything in one command:

    exiftool -all= -overwrite_original *.jpg

    This strips all EXIF, XMP, IPTC, and MakerNotes — the file contains nothing but visible pixels. Recommended by Compresto for batch uploads.

    Conclusion

    Strip EXIF metadata before sharing any photo. Use built-in OS tools for quick single-file cleaning, Scrambled Exif on mobile, and ExifTool for batch operations. Always avoid sending photos as “documents” in messaging apps — this bypasses automatic cleaning. Make metadata stripping a default step in your sharing workflow.

    FAQ

    Does removing EXIF metadata reduce image quality?

    No. Metadata is text stored in the file header — the actual pixels are unchanged. Most EXIF strippers only delete data tags, leaving resolution and visual quality intact.

    Can I recover deleted EXIF data?

    Generally, no. Once stripped and saved, metadata is gone from that copy. Even forensic tools cannot reconstruct deleted GPS coordinates. Always keep an original “master copy” in a private archive before stripping for sharing.

    Do screenshots contain the same metadata as photos?

    No. Screenshots typically only capture basic info (date, dimensions). They do not inherit GPS or lens data from the original image. Taking a screenshot is a quick way to strip metadata, though at a potential cost in resolution.

  • Master Class: How to AI Prompt with Image Generate Techniques for Midjourney, DALL-E, and Flux

    Master Class: How to AI Prompt with Image Generate Techniques for Midjourney, DALL-E, and Flux

    As of May 2026, this master class on how to AI prompt with image generate techniques for Midjourney, DALL-E, and Flux reveals that success lies in model-specific logic: use descriptive natural language for Flux Pro 1.1 and GPT-Image-1, while applying structured parameters and Style References for Midjourney v8.1. Leverage image-to-prompt reverse engineering and cinematic directives for professional-grade results.

    The 2026 Prompting Logic Matrix: Midjourney v8.1 vs. GPT-Image-1 vs. Flux

    Generative AI has moved past keyword stuffing. In 2026, professional creators use “intent-based” prompting, where the syntax matches the specific model architecture. According to NovaKit, API pricing has dropped 25-40x since 2024, making high-volume testing affordable and allowing creators to iterate until they achieve perfection.

    Model Comparison at a Glance

    Feature Midjourney v8.1 GPT-Image-1 Flux Pro 1.1 Ultra
    Prompting Style Structured parameters Natural language Natural language + ControlNet
    Best For Aesthetics, artistic control Text-in-image, UI mockups Precision layouts, poses
    Key Commands –ar, –sref, –cref Descriptive paragraphs ControlNet, depth maps
    Text Rendering Good (improving) Best in class Excellent with descriptive prompts
    Cost per HD Render ~$0.10 ~$0.17 ~$0.08-0.12

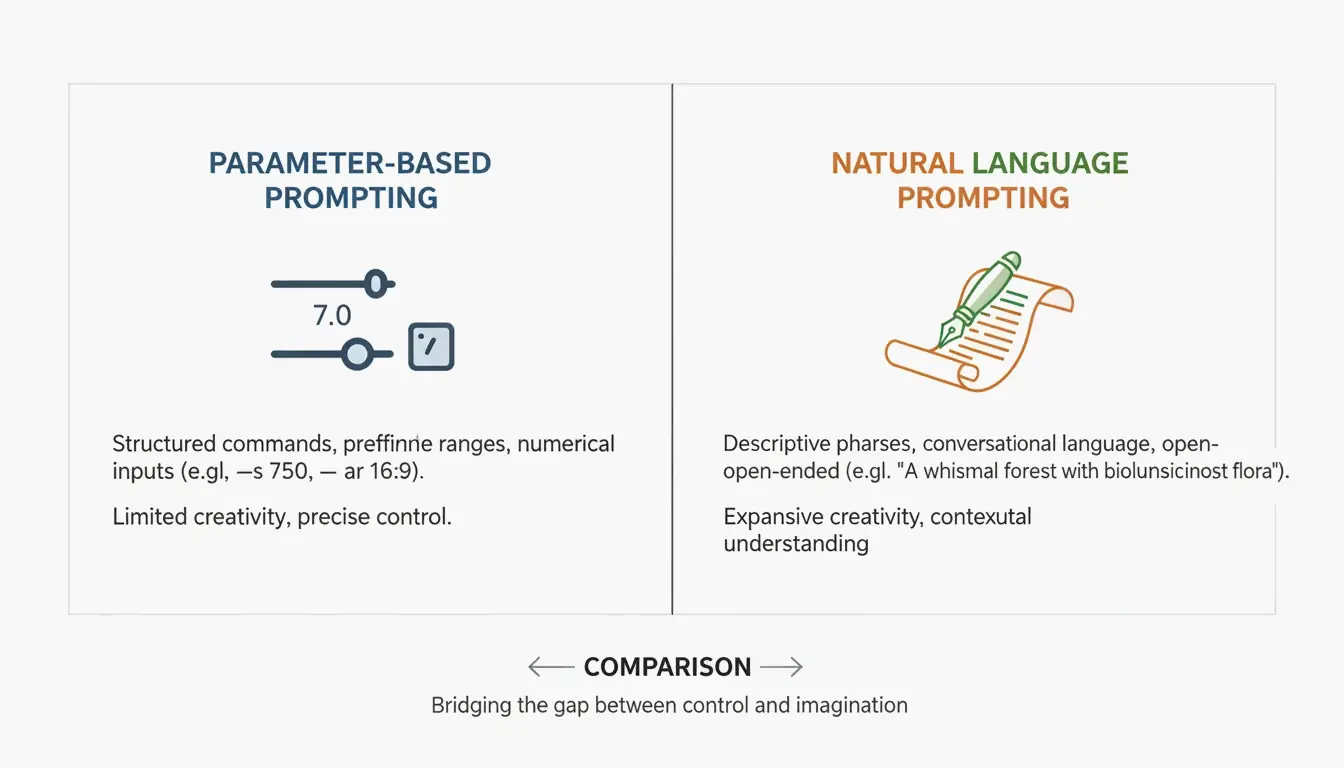
    Midjourney v8.1 remains the go-to for structural control. Commands like --ar (aspect ratio) and --sref (Style Reference) are essential. GPT-Image-1 and Flux Pro 1.1 Ultra work like a “Director’s Script,” following long natural descriptions and excelling at complex spatial arrangements.

    A comparison of Structured Parameters (Midjourney) vs Natural Language (Flux/GPT)

    As David Holz, founder of Midjourney, explains, artists use these tools to “rapid prototype” concepts for clients before diving into manual work. The goal in 2026 is to treat prompting as a precise engineering discipline.

    Framework: The Three-Layer Prompting Structure

    For consistent results across models, use this modular framework:

    Layer Purpose Example
    Subject Be specific about the main element “a weathered copper kettle” (not “a pot”)
    Environment Define lighting, background, and mood “harsh midday sun in a high-desert landscape”
    Technicals Model-specific parameters Midjourney: –stylize 750; Flux: “shot on 35mm f/1.8”

    How to Master Midjourney v8.1: Style References and Aesthetic Control

    Midjourney v8.1, released in April 2026, is the preferred tool for aesthetics-focused work. The key to brand consistency is the --sref (Style Reference) tag. By adding a URL to an existing image after this tag, you force the AI to match the colors, textures, and overall aesthetic of that reference.

    By 2026, the --personalize code has become a standard part of the workflow, helping the model learn your personal style over time. For photorealism, skip vague terms like “ultra-realistic” and use lens-specific prompts instead:

    Desired Effect Midjourney Prompt Directive
    Blurry background (bokeh) “shot on 35mm f/1.8”
    Wide architectural shots “shot on 14mm wide-angle”
    Flattened perspective “shot on 85mm telephoto”
    Sharp landscape detail “shot on 24mm f/8”

    Why Flux Pro 1.1 Ultra Is the New Standard for Precision and ControlNet

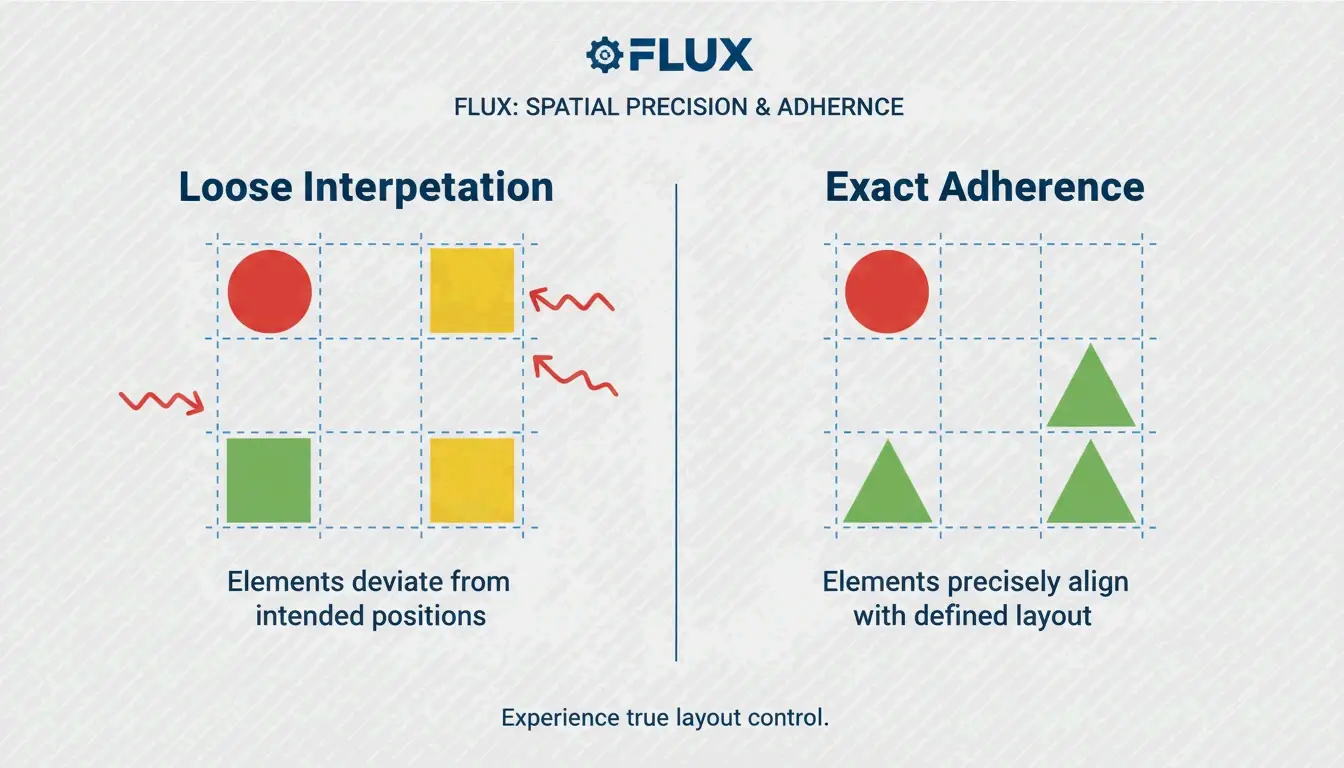
    Flux Pro 1.1 Ultra has become the developer favorite because of its tight integration with ControlNet tools. While Midjourney interprets your instructions, Flux adheres to them. ControlNet lets you lock in exact poses, depth maps, and layouts, ensuring your subject stays precisely where you place it in the frame.

    Flux also outperforms GPT-Image-1 in professional editing tasks like inpainting (fixing parts of an image) and outpainting (expanding an image). Data from NovaKit shows that Flux Pro 1.1 Ultra has the highest Prompt Adherence score in the industry for complex scenes.

    A comparison showing Flux's superior prompt adherence and control

    Commercial Photography: Integrating Imagen 4 for Product Renders

    For clean commercial product shots, Google’s Imagen 4 is often the best choice. It excels at high-end lighting and avoids AI artifacts on shiny surfaces. NovaKit reports that Imagen 4 delivers the cleanest product images at approximately $0.03 to $0.12 each, making it cost-effective for e-commerce catalogs.

    Can You Reverse Engineer Art? Mastering Image-to-Prompt Techniques

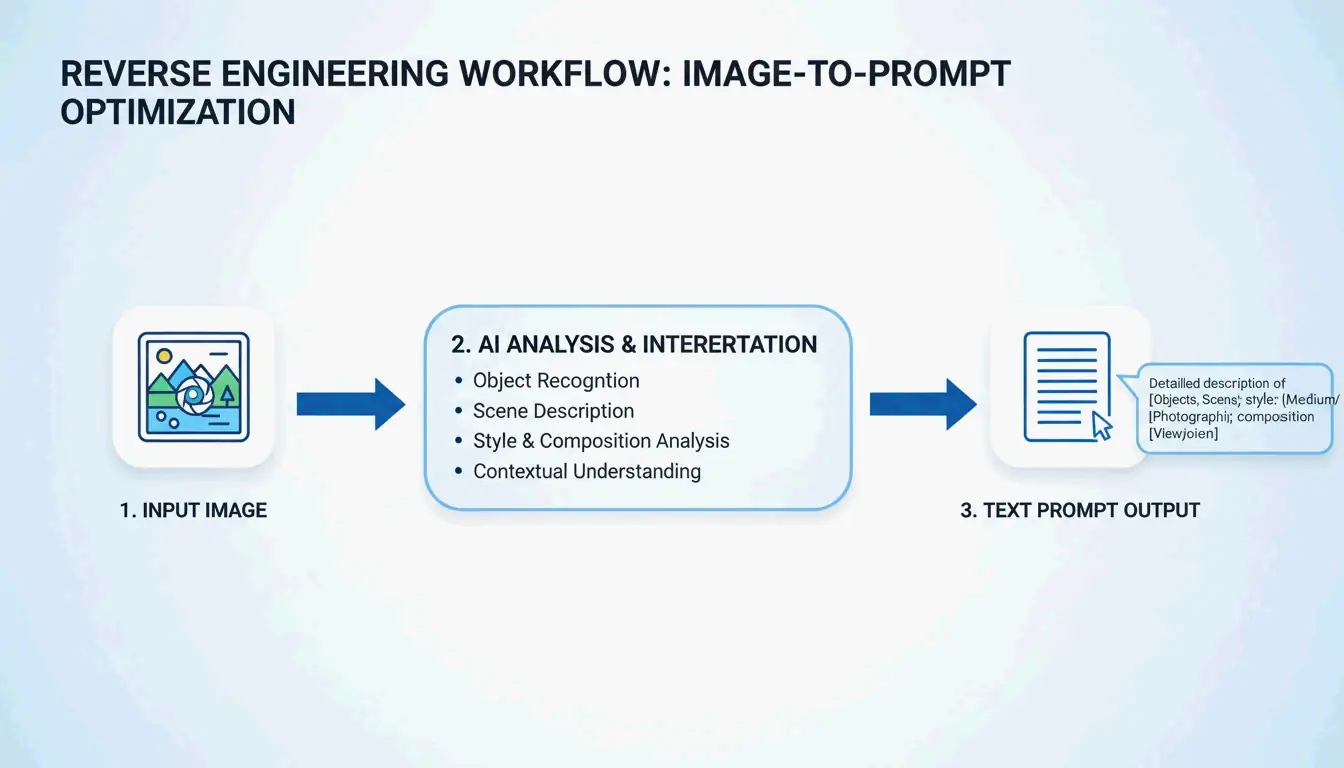
    In 2026, you do not always have to start with a blank text box. Tools like PixelPanda let you upload a photo, painting, or screenshot and receive four optimized prompts back (General, Flux, Midjourney, and Stable Diffusion).

    This image-to-prompt method enables cross-model workflows. For example, take a render from Midjourney, reverse-engineer the prompt using PixelPanda, then use that description in Flux Pro 1.1 for more structural control. You can also visit PromptBase to study the DNA of successful prompts.

    The 3-step loop: Upload Image, Extract Prompt, Generate New Version

    Professional Automation: Scaling Image Generation with MCP Servers and APIs

    For large projects, manual prompting is being replaced by automated workflows using the Model Context Protocol (MCP). By setting up an MCP server, developers can let AI agents like Claude or GPT-4 handle image generation autonomously. According to SamurAIGPT, this creates a Prompt-Generate-Review loop where the AI manages the entire creative process.

    Automation Level Tool Cost per Image Best For
    Individual Manual prompting $0.08-0.17 Single assets, exploration
    Team MCP server + agent $0.05-0.12 (bulk) Campaign variations
    Enterprise muapi CLI + API $0.02-0.05 (volume) Hundreds of marketing assets

    NovaKit notes that a GPT-Image-1 HD render now costs around $0.17. Using bulk generation through the muapi CLI, teams can create hundreds of marketing variations for a fraction of traditional stock photo or design costs.

    Conclusion

    Prompting in 2026 is a precise skill, not a guessing game. The key to professional results is understanding the architectural differences between models and applying the right technique to each.

    Action Plan:

    • Define your goal: Use Midjourney v8.1 for artistic projects and “beautiful by default” images.
    • Prioritize precision: Use Flux Pro 1.1 Ultra when you need total control over poses and layout.
    • Target text rendering: Use GPT-Image-1 for graphics that need readable text or UI mockups.
    • Scale with automation: Explore MCP servers and the muapi CLI to automate workflows and reduce costs.

    FAQ

    How do I achieve consistent character rendering across multiple images in 2026?

    Use Midjourney v8.1’s --cref (Character Reference) tag followed by the URL of your base character image. In Flux, the professional standard is using LoRA (Low-Rank Adaptation) weights trained specifically on your character. Additionally, maintaining consistent seed numbers and detailed physical descriptors helps prevent the AI from drifting between generations.

    Which AI model currently offers the best integrated text rendering for UI mockups?

    As of May 2026, GPT-Image-1 is the industry leader for precise text-in-image rendering, handling signs, labels, and UI elements. Flux Pro 1.1 Ultra is a close second, offering excellent font control through descriptive prompts. Midjourney v8.1 has significantly improved its text capabilities but still prioritizes artistic quality and may occasionally struggle with literal character accuracy in complex strings.

    Is it possible to generate AI images without using Discord for Midjourney v8.1?

    Yes. By May 2026, the Midjourney Web Alpha is fully public, allowing all users to generate and edit images directly through a browser interface. Professional users can also leverage the official Midjourney API or third-party wrappers like muapi to integrate Midjourney generation into Discord-free, agentic workflows and custom applications.

  • Can AI Remove Watermark from Photo? 2026 Guide to the Best Tools and Techniques

    Can AI Remove Watermark from Photo? 2026 Guide to the Best Tools and Techniques

    Yes, in 2026, AI can remove watermark from photo files with high accuracy. Using deep learning, tools like Pixelbin and HitPaw employ Generative Inpainting to reconstruct backgrounds or Reverse Alpha Blending to mathematically reverse semi-transparent overlays. These techniques can clean complex AI-generated labels — such as Gemini’s “Nano Banana” — without degrading image quality.

    How Does AI Remove Watermark from Photo? The 2026 Technical Breakdown

    Watermark removal has moved far beyond manual clone-stamp editing. Modern neural networks analyze image context to intelligently restore covered areas. In 2026, the real challenge is not visibility but how the watermark is embedded. Standard logos are straightforward to erase, but invisible markers like SynthID are woven into the image’s mathematical structure, making them extremely difficult to remove without quality loss.

    According to HitPaw, their AI solution maintains a 98% satisfaction rate across more than 6.5 million downloads. These systems rely on two core methods:

    Generative Inpainting: Reconstructing Missing Pixels

    Generative Inpainting works by analyzing the healthy pixels surrounding a watermark — examining textures, lighting, and patterns — to predict what should be behind the logo. Tools like HitPaw use Content-Aware Fill models to plug the gaps automatically, blending new pixels naturally with the surrounding image.

    Reverse Alpha Blending: Mathematical Pixel Recovery

    Unlike inpainting, Reverse Alpha Blending is a calculation, not a prediction. Most watermarks are applied using the formula: Watermarked = alpha x Logo + (1 - alpha) x Original. If the AI can determine that formula (the alpha map), it reverses the math to recover the original pixels. This is the optimal method for semi-transparent text because it restores actual data rather than painting over it.

    Side-by-side visual comparison of Inpainting (reconstructing) vs. Alpha Blending (mathematical reversal)

    Removing AI-Generated Watermarks: Gemini (Nano Banana) and Meta AI

    By 2026, a new category of challenge has emerged: watermarks generated by AI systems themselves, such as Meta’s “Imagined with AI” label and Google’s “Nano Banana” pattern. These are engineered to be persistent. Standard removal tools often leave behind visible artifacts.

    Research by Allen Kuo produced specialized 48×48 and 96×96 Reverse-Alpha Masks designed for Gemini watermarks. By targeting the exact blending mathematics Google uses, these scripts achieve pixel-perfect cleanup that general-purpose erasers cannot match.

    The “AI vs. AI” Workflow for Synthetic Media

    For professional results on AI-generated images, experts deploy a two-pass workflow. After the initial watermark is removed, a second pass using models like FDnCNN (Fast Deep Convolutional Neural Network) cleans up residual edge artifacts. As Allen Kuo notes, removing SynthID without quality loss is nearly impossible because it is entangled with the entire image. However, for visible labels, GPU-accelerated denoisers effectively eliminate the “sparkle” or blurry edges that basic tools leave behind.

    Best AI Watermark Removers in 2026: Ranked by Performance

    The market splits between accessible web tools and powerful developer scripts. A 2026 test of 15 services by GStory AI found that performance depends heavily on background complexity and watermark opacity.

    Top Free Picks for Quick Web Edits

    Tool Key Strength Format Support Free Tier
    GStory AI Complex area reconstruction JPG, PNG, WEBP 50 free credits
    DeWatermark.ai Multiple watermark handling JPG, PNG Auto 3.0 mode
    Phototune AI No-signup simplicity JPG, PNG (up to 10MB) Free
    Pixelbin Modern format support WEBP, HEIC Auto Mode

    Pro Tools for Batch Processing and High-Resolution Assets

    For bulk work, Batch Processing is essential. PhotoGrid allows processing up to 20 photos simultaneously at no charge. For developers, GitHub tools like the Gemini Watermark Tool can integrate into Claude Code Skills or MCP Servers, enabling AI agents to handle removal automatically within local workflows using FDnCNN for high-resolution output.

    Step-by-Step: How to Use AI to Remove Watermarks Without Quality Loss

    Most AI tools simplify the process into three stages:

    1. Upload: Select your file (JPG, PNG, or WEBP). Tools like Pixelbin accept files up to 10MB.
    2. Mask Selection: Let “Auto Mode” detect the logo, or use a manual brush to highlight the area.
    3. Refinement: After removal, use a “Magic Brush” or Content-Aware Fill to clean up any spots the AI missed.

    3-step linear flow: Upload then Selection then Refine

    Troubleshooting: What to Do When AI Leaves a Blur

    If a blurry patch remains, the background was likely too complex for the AI to predict accurately. Run a second pass with a denoiser like FDnCNN to smooth out the noise. For final polish, a quick touch-up with a Clone Stamp tool in an editor like Photopea provides professional-grade results.

    Conclusion

    Watermark removal in 2026 has evolved from simple blurring to mathematical precision via Reverse Alpha Blending. Whether handling a standard copyright logo or a stubborn Gemini “Nano Banana” label, current tools are up to the task. For quick fixes, web tools like GStory or Pixelbin are the most accessible options. For photographers and professionals who demand pixel-perfect output, GitHub-based tools and MCP server integrations offer maximum control without the “hallucinations” typical of basic AI erasers.

    FAQ

    Is it legal to remove watermarks from images for personal use?

    Generally, removing a watermark is illegal if it infringes on copyright, as protected under DMCA Section 1202. Exceptions may exist for recovering your own lost assets or for uses that fall under specific fair use provisions. Always verify the original creator’s license before modifying an image.

    Can AI remove invisible watermarks like Google’s SynthID?

    No. While AI can erase the visible pixels of a logo, SynthID is embedded into the image’s structural features. Removing it typically requires degrading the image quality to an unusable state. According to research by Allen Kuo, SynthID remains detectable by specialized safety tools even after visible editing or cropping.

    How to remove watermarks from photos on iPhone or Android without an app?

    Use mobile-optimized web tools like DeWatermark.ai or GStory directly in your mobile browser. Modern mobile browsers support Generative Inpainting APIs for one-click removal. This approach avoids the security risks of downloading “free” apps that may contain malware or excessive advertising.

  • Optimizing Photos for Website Performance: The 2026 Technical Guide

    Optimizing Photos for Website Performance: The 2026 Technical Guide

    Optimizing photos for your website in 2026 requires prioritizing modern formats like AVIF and WebP, resizing dimensions for responsive displays, and applying lossy compression. By implementing lazy loading, descriptive alt text, and CDNs, you significantly improve Core Web Vitals (LCP) and visibility in both traditional and AI-driven search engines.

    The 2026 Framework for Optimizing Photos for Website Speed

    Image weight remains the biggest hurdle for web performance. According to NeedleCode, images make up over 60% of the total weight of a typical webpage. This directly impacts your Core Web Vitals, specifically the Largest Contentful Paint (LCP) — the metric that tracks how fast your main content appears. Data from SimpleResizer shows that images trigger the LCP on 70% of pages, meaning search rankings are essentially tied to photo loading speeds.

    Follow this three-step optimization order: Format, Scale, Compress. Start by choosing a modern file type, resize the image to the exact size it will appear on screen, and finally use a compression algorithm to trim unnecessary data.

    The 3-step optimization workflow: Format, Scale, Compress

    Auditing Your Current Performance with DebugBear

    Before making changes, establish a baseline. Tools like DebugBear let you track “Page Weight (Images)” as a specific metric to find pages where heavy media is slowing things down. Set a Performance Budget — for example, an alert if a key page exceeds 600KB in image weight.

    Choosing the Right Format: Why AVIF Is the 2026 Standard

    Format selection is the easiest path to big performance gains. JPEG is mostly phased out in professional web development.

    Format Compression Browser Support Best Use Case
    AVIF Best (smallest files at equal quality) All modern browsers Hero images, high-quality photography
    WebP High (25-35% smaller than JPEG) All modern browsers General site images, reliable default
    PNG Low (lossless, larger files) Universal Flat graphics, logos, transparent backgrounds
    SVG Code-based (resolution-independent) All browsers Icons, simple logos

    An often-overlooked step is stripping EXIF Data. Every camera photo hides metadata like GPS coordinates and timestamps. SimpleResizer notes that removing this data shrinks the file and protects privacy without changing the photo’s appearance. A WordPress Support case study found that exporting a JPEG via GIMP at Quality 60 (with 4:2:0 subsampling) cuts file size by 64% with almost no visible difference.

    Developer Cheat Sheet: Implementing AVIF with WebP Fallbacks

    To use the newest formats without leaving older browsers behind, implement the HTML picture element pattern. This lets the browser select the best format it supports:

    1. Set a source element with type “image/avif” pointing to your AVIF file
    2. Set a source element with type “image/webp” pointing to your WebP file
    3. Set a fallback img element pointing to your JPEG, with loading=”lazy” and descriptive alt text

    This progressive approach ensures every visitor gets the best format their browser supports.

    Technical Implementation: Resizing and Responsive Delivery

    A common mistake is uploading a 4000px wide photo into a 1200px display space. If your content area is 600px wide, WordPress Support recommends serving an image about 1.5 to 2 times that width (1200px). This keeps the image sharp on high-resolution Retina screens without wasting bandwidth.

    Display Width Recommended Image Width Reason
    400px 800px 2x for Retina
    600px 1200px 2x for Retina
    800px 1200px 1.5x (balance of quality and size)

    Use the srcset attribute to offer multiple sizes. This way, a phone does not download a desktop-sized image. For manual optimization, Squoosh and TinyPNG are the go-to tools. DebugBear reports that resizing a standard Pexels image from 7108px to 1266px slashes file size by 89%.

    Responsive image delivery: serving different sizes to different devices

    The Role of a CDN in Global Image Delivery

    Even a perfectly optimized image will feel slow if it travels halfway around the world. A Content Delivery Network (CDN) like Cloudflare or BunnyCDN keeps copies of your images on edge servers closer to users. Many modern CDNs handle format conversion and resizing automatically based on the user’s device.

    Future-Proofing for GEO: Image SEO in the AI Era

    In 2026, photo optimization is about more than speed — it is about Generative Engine Optimization (GEO). AI search tools and visual search like Google Lens need to “read” your images to understand your content. Statistics from SimpleResizer show that 20-30% of all e-commerce traffic now comes from Google Images and visual discovery tools.

    Follow these steps for AI-ready images:

    Step Action Example
    Filenames Use descriptive names red-leather-armchair.webp (not IMG_4837.jpg)
    Alt Text Write factual descriptions “Barista pouring milk into a latte to form a tulip pattern”
    Placement Keep images near related text Helps crawlers understand context

    Lazy Loading: Improving UX and Initial Paint

    Native lazy loading should be used for any image below the fold. Adding loading="lazy" tells the browser to wait before downloading those images, saving data and speeding up the Critical Rendering Path. Important: never lazy load your top hero image. That image is your LCP, and delaying it will hurt your SEO.

    Conclusion

    Modern image optimization balances visual quality with performance. Clicking “Save for Web” is no longer sufficient. You need next-gen formats like AVIF, responsive srcset delivery, and AI-ready alt text.

    To stay ahead in 2026, audit your site with PageSpeed Insights or DebugBear, move toward AVIF as your default format, automate compression where possible, and ensure every image has a clear reason for being on the page. This boosts Core Web Vitals and ensures visibility in the era of visual search.

    FAQ

    Does image optimization affect my Core Web Vitals (LCP/CLS) scores?

    Yes. Images are the primary driver of Largest Contentful Paint (LCP), which measures how fast main content loads. Providing explicit width and height attributes prevents Cumulative Layout Shift (CLS) by allowing the browser to reserve space before the image downloads, ensuring a stable visual experience.

    Should I use a WordPress plugin or optimize images manually before uploading?

    Manual optimization using tools like Squoosh offers the highest quality control and is ideal for critical assets like hero banners. For high-volume sites or blogs, WordPress plugins like Smush, Imagify, or EWWW Image Optimizer are better for bulk automation, ensuring every uploaded image is resized and compressed consistently.

    What is the blur-up technique and how does it improve user perception?

    The “blur-up” technique loads a tiny, low-resolution placeholder (often 10-20 pixels wide) that is stretched and blurred to fit the image container. As the high-resolution version downloads in the background, it replaces the placeholder. This improves perceived speed by giving users a visual hint immediately, reducing bounce rates.

    Comparison of blur-up vs standard loading